

 As many of you right now, the
 <canvas> element is one of the most popular additions to the HTML5 standards. It is widely supported by popular browsers like Firefox, Chrome, Safari and Opera (Internet Explorer supports it in their IE9 beta version). This guide will explore the use of HTML5’s <canvas> element through a fun example: bouncing a blue ball around.
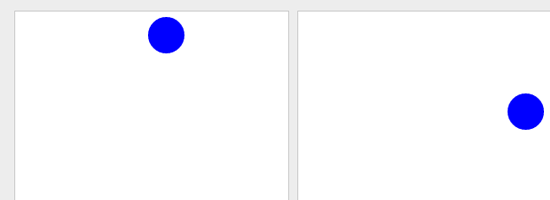
Final Result

An Overview of HTML5’s Canvas
The <canvas> tag primarily allows you to render 2D shapes and images dynamically using math functions.
Practical uses for this are things such as dynamic charts that are populated by data from a relational database like MySQL or web games that rely solely on open technologies (JavaScript/HTML). While <canvas> in HTML merely allows you to define a region in terms of width and height, everything else related to the actual drawing of the shapes is done through JavaScript via a full set of drawing functions and methods (collectively known as the Canvas 2D API). So that we may explore the <canvas> element through a hands-on approach, we will create a ball that will be bouncing around using HTML5 specifications and JavaScript.
Note that we will skip CSS because this guide is about HTML5 and JavaScript. CSS doesn’t play a part in the appearance and functionality of the bouncing ball, so we don’t need to discuss it.
HTML
To start, you will need to create a basic HTML document. It’s best if you follow along with me as we go — so go ahead and create your HTML document now.
Let’s add our <canvas> element inside the <body> tag. Though we only have one <canvas> element in our HTML for this example, I have still assigned an ID to it (myCanvas) just to make it easier/quicker to select it later on via JavaScript. I also defined the element’s dimensions (width/height), however, you could just as well do that via CSS by targeting the #myCanvas ID.
<body> <canvas id="myCanvas" width="500" height="400"> </canvas> </body>
JavaScript
Now let us start with the actual work of creating our shapes in JavaScript.
Draw the Circle
We are going to draw a circle using the arc[1] and fill[2] methods.
The syntax is self-explanatory, especially if you’re familiar with JavaScript. Basically, we define the context, initiate the drawing, then we use color and style methods to fill in the color and dictate the shape (using a Math object for a circle). Then when the HTML document is loaded (body’s onLoad), we just call the init() function.
Note that it’s better to write unobtrusive JavaScript but I would like to keep this exploration brief, simple and as self-explanatory in code as possible.
<script> var context; function init() { context= myCanvas.getContext('2d'); context.beginPath(); context.fillStyle="#0000ff"; // Draws a circle of radius 20 at the coordinates 100,100 on the canvas context.arc(100,100,20,0,Math.PI*2,true); context.closePath(); context.fill(); } </script> <body onLoad="init();"> <canvas id="myCanvas" width="300" height="300" > </canvas> </body>Save the HTML file and open it in a browser that supports <canvas> and HTML5 (latest Safari, Opera, Chrome, and Firefox versions) so that you can preview the code. If everything is fine, you should be seeing a blue circle that has a radius of 20px (or in other words, 40px in diameter). 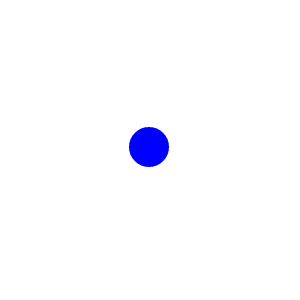
Move the Circle
Now that we have the circle, let’s try to move it.
We’ll replace the hardcoded values of the coordinates in the .arc method (100, 100 — the first two arguments) with variables x and y, which we will then increment by an amount of dx and dy. Also since we need to redraw the circle at the new positions, we’ll move the code into a function called draw() and call it every 10ms using JavaScript’s setInterval() function.
<script> var context; var x=100; var y=200; var dx=5; var dy=5; function init() { context= myCanvas.getContext('2d'); setInterval(draw,10); } function draw() { context.beginPath(); context.fillStyle="#0000ff"; // Draws a circle of radius 20 at the coordinates 100,100 on the canvas context.arc(x,y,20,0,Math.PI*2,true); context.closePath(); context.fill(); x+=dx; y+=dy; } </script> <body onLoad="init();"> <canvas id="myCanvas" width="300" height="300" > </canvas> </body>Save the file and test your work in your web browser. Uh oh — Houston, we have a problem.
The circle is actually forming a line (see the image below). 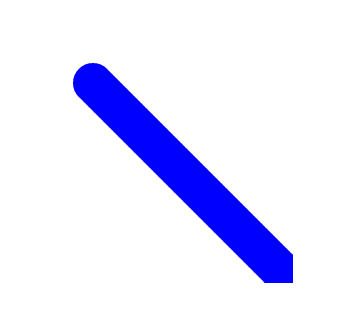 This is because each time the
 draw() function is called, it draws a circle at the new coordinates without removing the old ones. That’s how the getContext object works so it’s not a bug; it doesn’t really move the circle and, instead, it draws a circle at the new coordinates each time the function is called.
To erase the old circles, we’ll need to call the clearRect method right at the start of our draw() function so that it clears out the previous circle before it draws the new one.
<script> var context; var x=100; var y=100; var dx=5; var dy=5; function init() { context= myCanvas.getContext('2d'); setInterval(draw,10); } function draw() { context.clearRect(0,0, 300,300); context.beginPath(); context.fillStyle="#0000ff"; // Draws a circle of radius 20 at the coordinates 100,100 on the canvas context.arc(x,y,20,0,Math.PI*2,true); context.closePath(); context.fill(); x+=dx; y+=dy; } </script> <body onLoad="init();"> <canvas id="myCanvas" width="300" height="300" > </canvas> </body>Save the file and refresh your browser and see the ball move out of the screen nicely.
Limit the Area with an Imaginary Wall
Now it’s time to bounce the ball off the corners of the <canvas> element. Well, that’s easy: All you need to do is check if the values of x and y are beyond the canvas dimensions, and if so, we need to reverse the direction by setting values of dx and dy to the negative values.
<script> var context; var x=100; var y=200; var dx=5; var dy=5; function init() { context= myCanvas.getContext('2d'); setInterval(draw,10); } function draw() { context.clearRect(0,0, 300,300); context.beginPath(); context.fillStyle="#0000ff"; // Draws a circle of radius 20 at the coordinates 100,100 on the canvas context.arc(x,y,20,0,Math.PI*2,true); context.closePath(); context.fill(); // Boundary Logic if( x<0 || x>300) dx=-dx; if( y<0 || y>300) dy=-dy; x+=dx; y+=dy; } </script> <body onLoad="init();"> <canvas id="myCanvas" width="300" height="300" > </canvas> </body>If all goes well, you should see a ball bouncing around the four corners of the canvas element (like in the demo). Awesome, right?
Conclusion
This bouncing ball is a fundamental concept to many of the game development logic and it can be easily extended to build a ping-pong game or a breaker-type of game.
But more than the actual demonstration itself, what I hope to have imparted here is the motivation to explore the Canvas API to see if you can push your limits and be on the cutting edge. So in order to help you continue your journey into HTML5, I would like to share with you some resources to check out:
- Canvas 2D API Specification 1.0: Latest W3C draft
- How to Make an HTML5 iPhone App: An example of using HTML5 for creating a Tetris game (uses Canvas)
- The Only HTML5 Resources You Need for Getting Up to Speed: A collection of resources to help you get caught up with HTML5 developments
- The State of HTML5 Apps: An introduction to using HTML5 and open technologies to build robust web applications
References
- The Canvas 2D API 1.0 Specification – 3.4 Colors and styles
- The Canvas 2D API 1.0 Specification – 3.8 Complex shapes (paths)
Related Content
-
 President of WebFX. Bill has over 25 years of experience in the Internet marketing industry specializing in SEO, UX, information architecture, marketing automation and more. William’s background in scientific computing and education from Shippensburg and MIT provided the foundation for MarketingCloudFX and other key research and development projects at WebFX.
 -

WebFX is a full-service marketing agency with 1,100+ client reviews and a 4.9-star rating on Clutch! Find out how our expert team and revenue-accelerating tech can drive results for you! Learn more
Make estimating web design costs easy
Website design costs can be tricky to nail down. Get an instant estimate for a custom web design with our free website design cost calculator!
Try Our Free Web Design Cost Calculator
Share this article


Web Design Calculator
Use our free tool to get a free, instant quote in under 60 seconds.
View Web Design CalculatorMake estimating web design costs easy
Website design costs can be tricky to nail down. Get an instant estimate for a custom web design with our free website design cost calculator!
Try Our Free Web Design Cost Calculator


