
In this web design tutorial, we’ll create a light and sleek layout in Photoshop. We will use the 960 Grid System, and if you haven’t used it before, no problem, I will show you how it works and how it can help you design better layouts.
Final Result
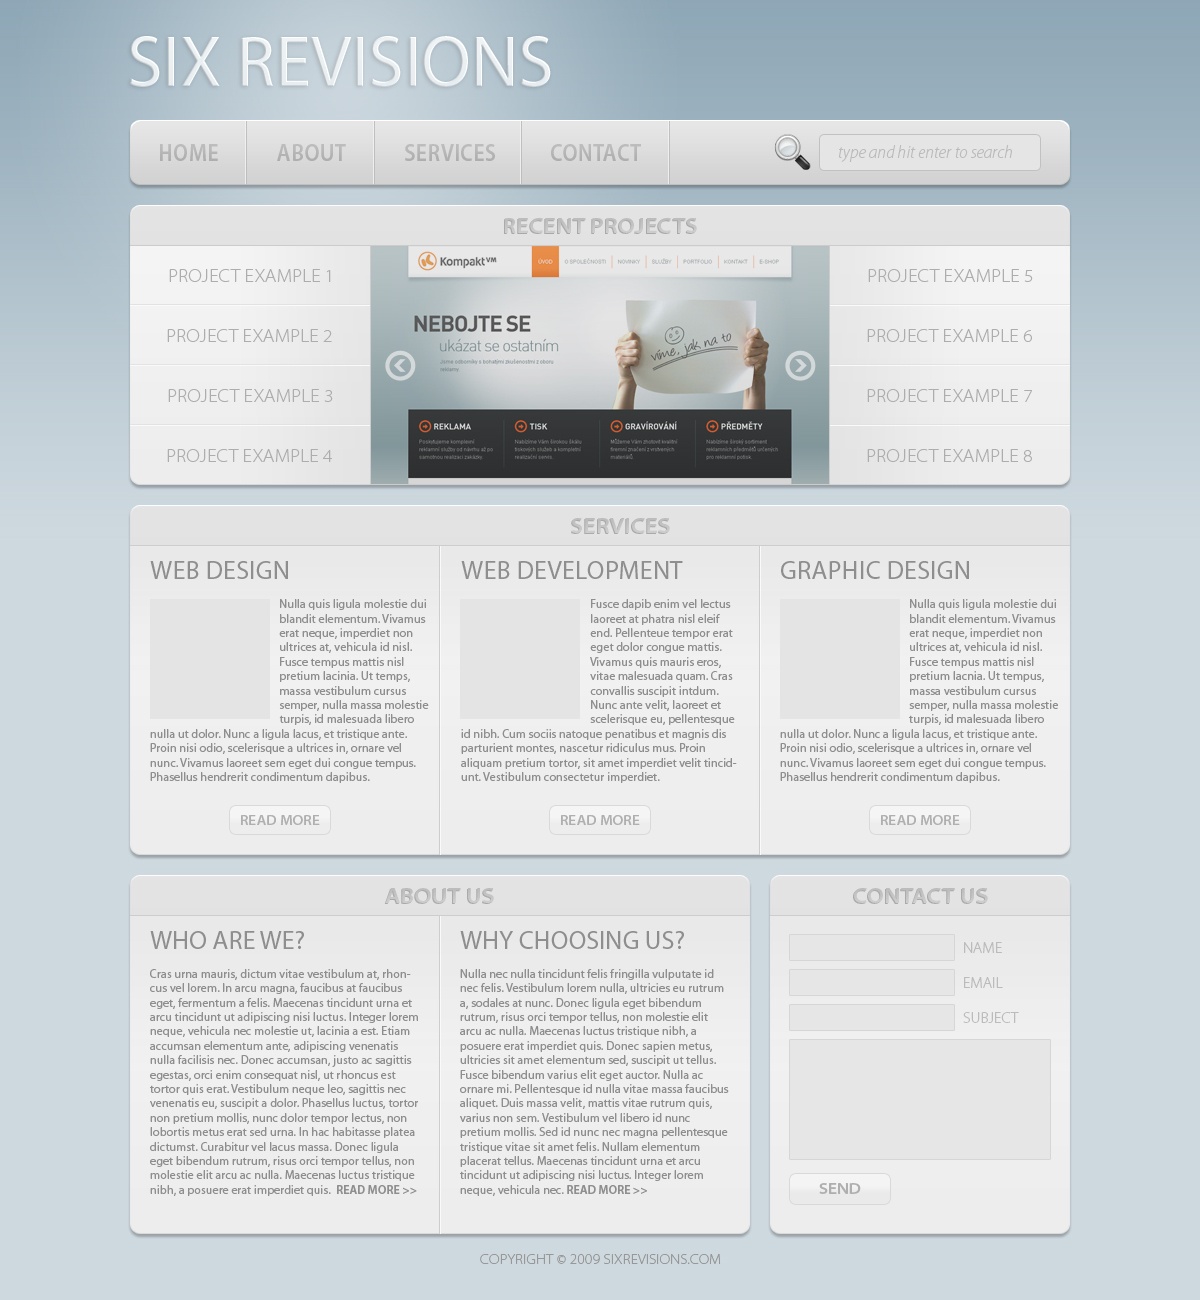
Below, you can see the final result of the what we are creating. Clicking on the image will show you the full-scale version of the web layout.
Preparation: download the 960 Grid System template
Before we begin creating our layout, go to 960.gs and download the grid system.
Then unpack the ZIP file and open the PSD file which contains the a 12-column grid; you will find this file by going to 960_download > templates > photoshop folder.
If you look in your Layers Panel, you’ll see that you have the standard Photoshop Background layer and two groups. You can delete the Layer 1 group because we don’t need it. The 12 Col Grid group should always remain on top.
To hide the grid when you don’t need it, simply click on the eye icon of this group in the Layers Panel to toggle off its visibility.
Besides the red bars that you see, the PSD file also contains some guides that will be very useful. To see these guides, go to View > Show > Guides (you can use the shortcut Ctrl+; to toggle the visibility of your guides).
Start off by increasing the size of the document
1 To begin our layout’s design, go to Image > Canvas Size, set the width to 1200px and the height to 1300px, and then click OK.

Creating the background
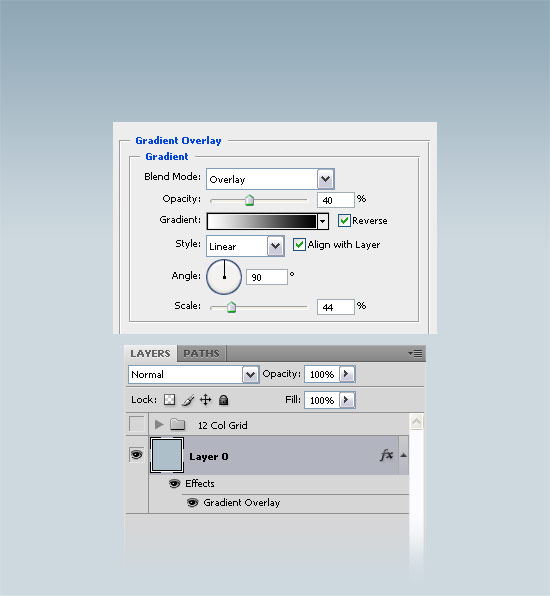
2 Use the Paint Bucket Tool (G) to fill the background with the color #ADBFCA.
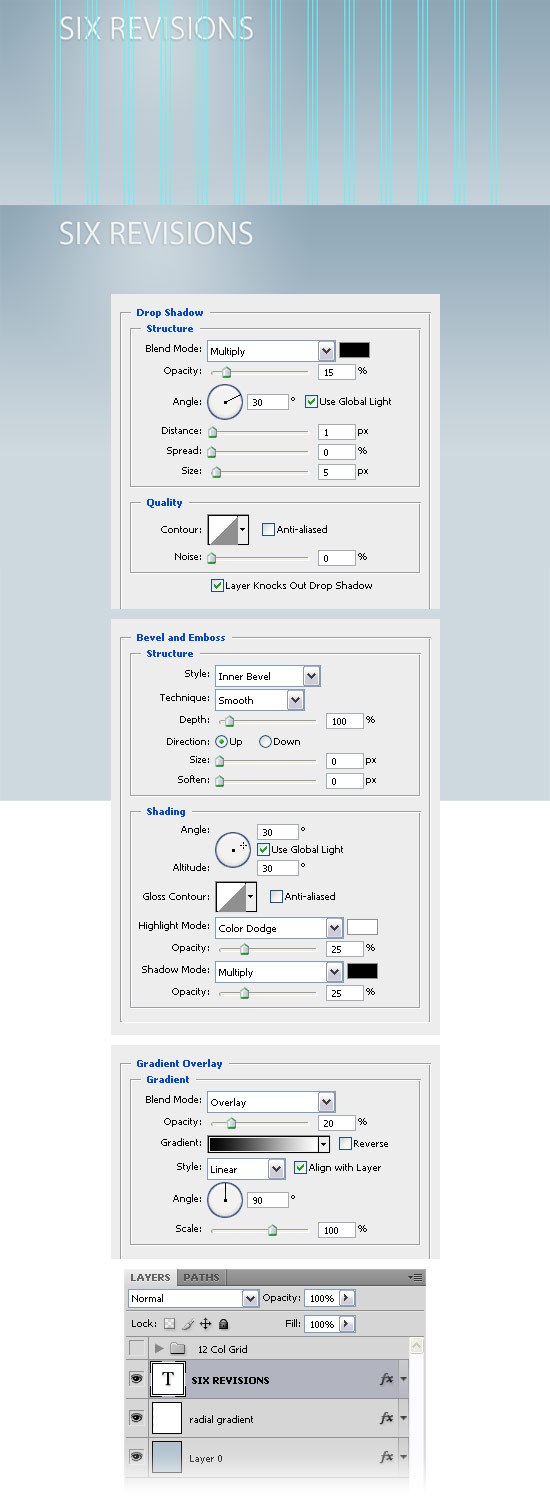
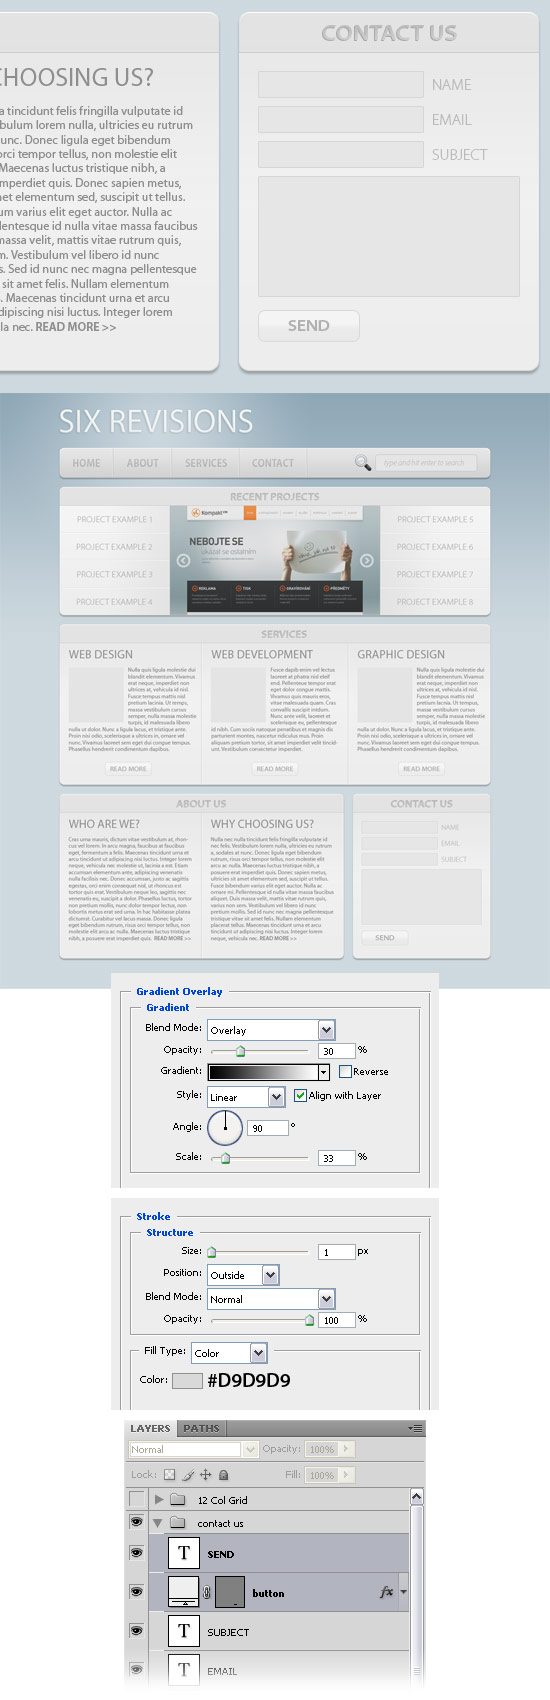
3 Double-click on the Background layer to unlock it. Double-click on this layer again to open the Layer Styles window and use the settings from the following image for the Gradient Overlay layer style.
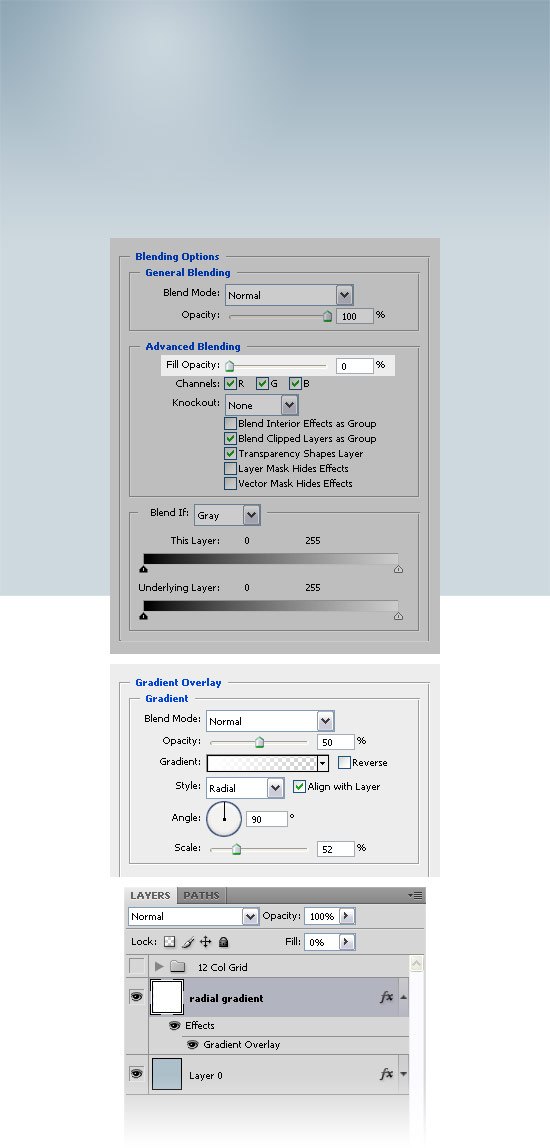
4 Now, we are going to create a white radial gradient at the top of our layout. First, create a new layer and fill it with white.
5 Double-click on this layer to open the Layer Style window, set the Fill Opacity to 0% and use the settings from the following image for the Gradient Overlay layer style. While the Layer Style window is still opened, click on your image and move the gradient at the top of your layout. Take a look at the following image for reference.
Name this layer radial gradient.
6 Choose the Horizontal Type Tool (T) from the Tools Panel and write the name of your site above the white gradient which you have created with the color #EBF0F3. For this layout, I have used only fonts from the Myriad Pro family, but you are free to use any other fonts you want.
7 Double-click on this text layer to open the Layer Style window and use the settings from the following image.
Creating the navigation bar
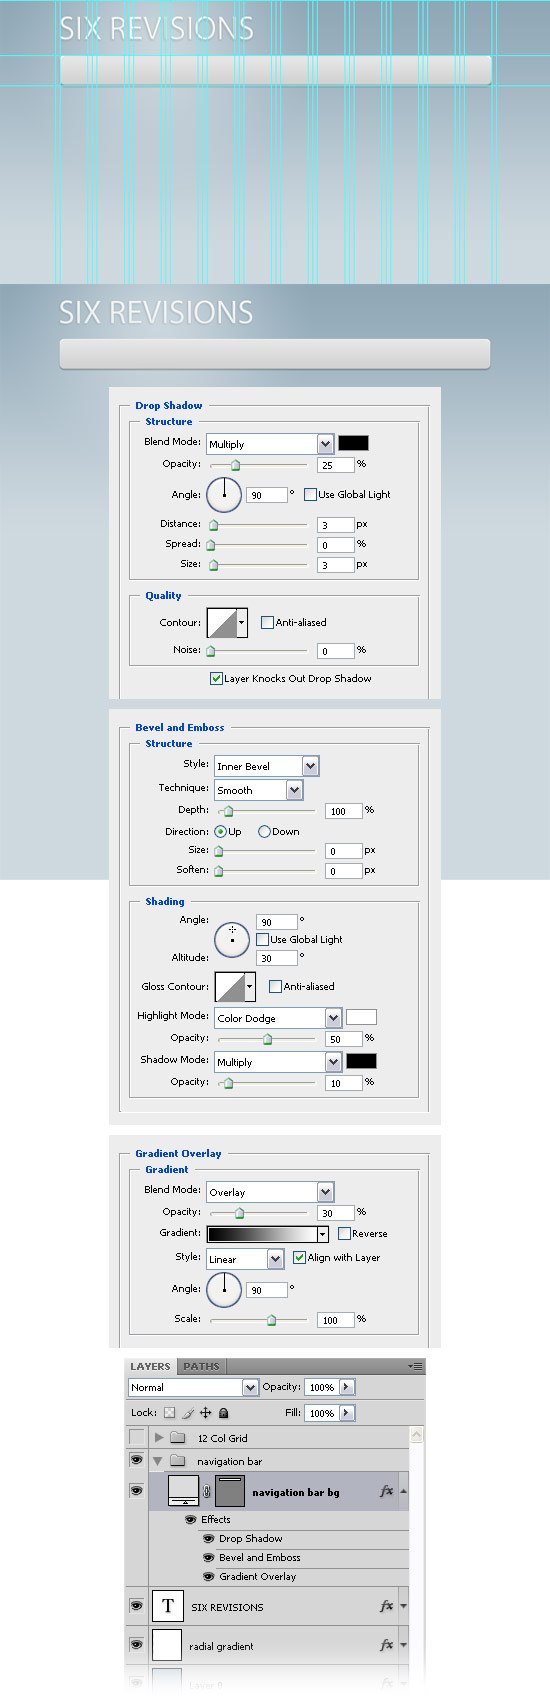
8 Create a new group (Layer > New > Group) and name it navigation bar. Select the Rounded Rectangle Tool (U), set the Radius to 10px and the Color to #DCDCDC, and create a rounded rectangle with the dimensions 960px by 65px.
Double-click on this layer to open the Layer Style window and use the settings from the following image.
Note: open the Info Panel (F8) to see the size dimensions (width and height) of your rounded rectangle while you are creating it. Also, to create more guides onto your canvas, click and hold down on a ruler (they’re at the sides of the Photoshop GUI), and then drag towards the canvas.
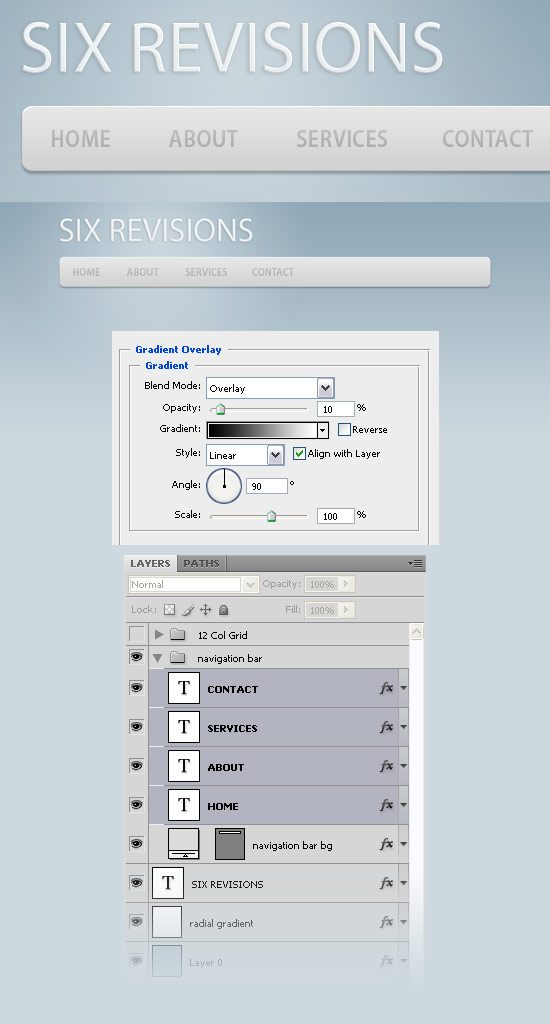
9 Select the Horizontal Type Tool (T) and add the text for your navigation menu items, using the color #B5B5B5. Add a Gradient Overlay layer style to each of these text layers, using the settings from the following image.
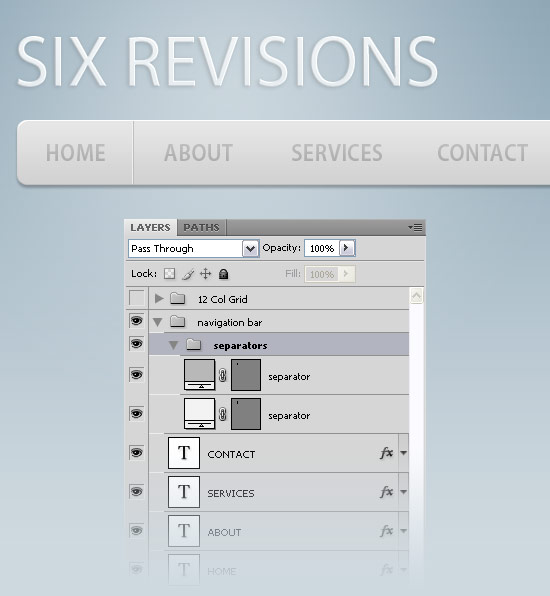
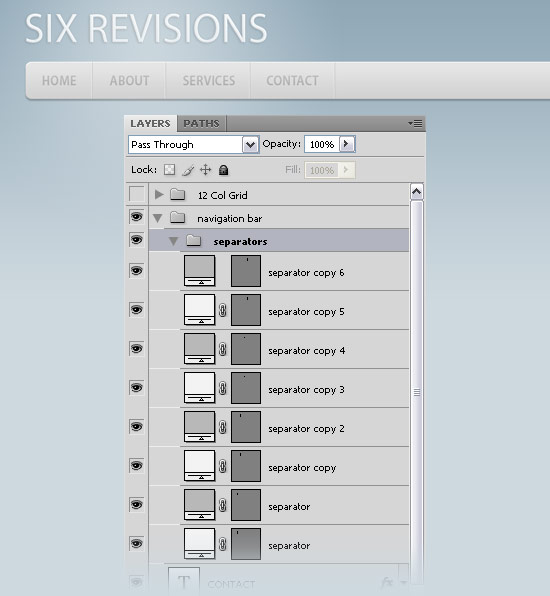
10 Create a new group and name it separators.
11 Get the Line Tool (U) from the Tools Panel, set the Weight to 1px, hold down the Shift key to keep the line straight, and create a vertical line from the top of your navigation bar to the bottom using the color #F3F3F3.
12 Duplicate this layer (Ctrl+J), select the Move Tool (V) and hit the right arrow on your keyboard to move this layer one pixel to the right. Change the color of this line to #B8B8B8.
Doing this step creates a very nice inset effect that’s subtle but adds a detail to the design.
13 Select the two layers inside the separators group (hold down the Ctrl key and click on them in the Layers Panel) and duplicate these layers by dragging them over the “Create a new layer” button from the bottom of the Layers Panel. Create as many separators as you need and put them between your navigation menu items.
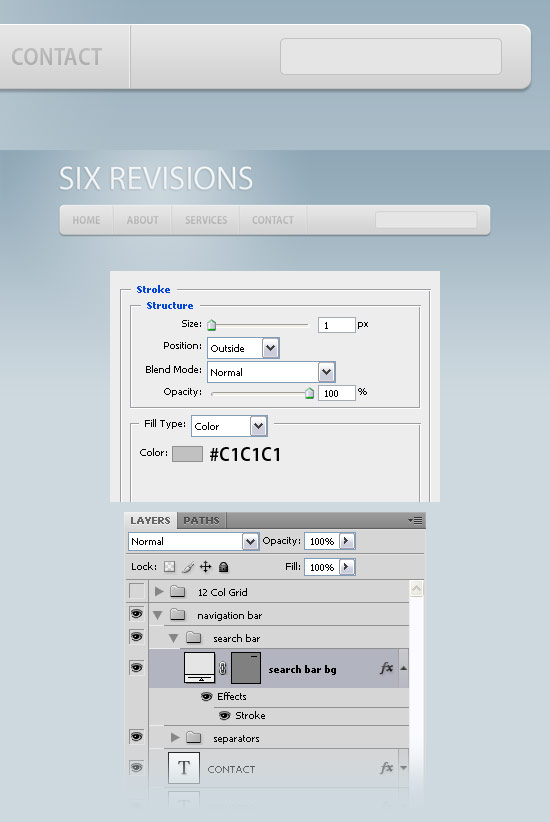
Designing the search bar
14 Create a new group and name it search bar“. Then select the Rounded Rectangle Tool (U), set the Weight to 4px and create a rounded rectangle with the dimensions 220px by 35px in the right side of your navigation bar using the color #E5E5E5.
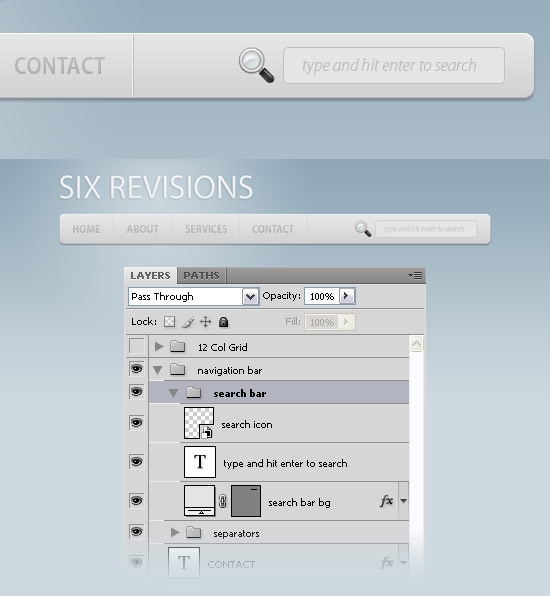
15 Select the Horizontal Type Tool (T) and write the words “type and hit enter to search” inside your search bar, using the color #BBBBBB.
16 For the search icon, we will get an icon from the free icon set called Function Icon Set. Download the set, unpack it, look for the search icon and open it in Photoshop. Get the search icon into your canvas and move it into position using the Move Tool (V); put this icon in the left side of your search bar and name its layer “search icon“.
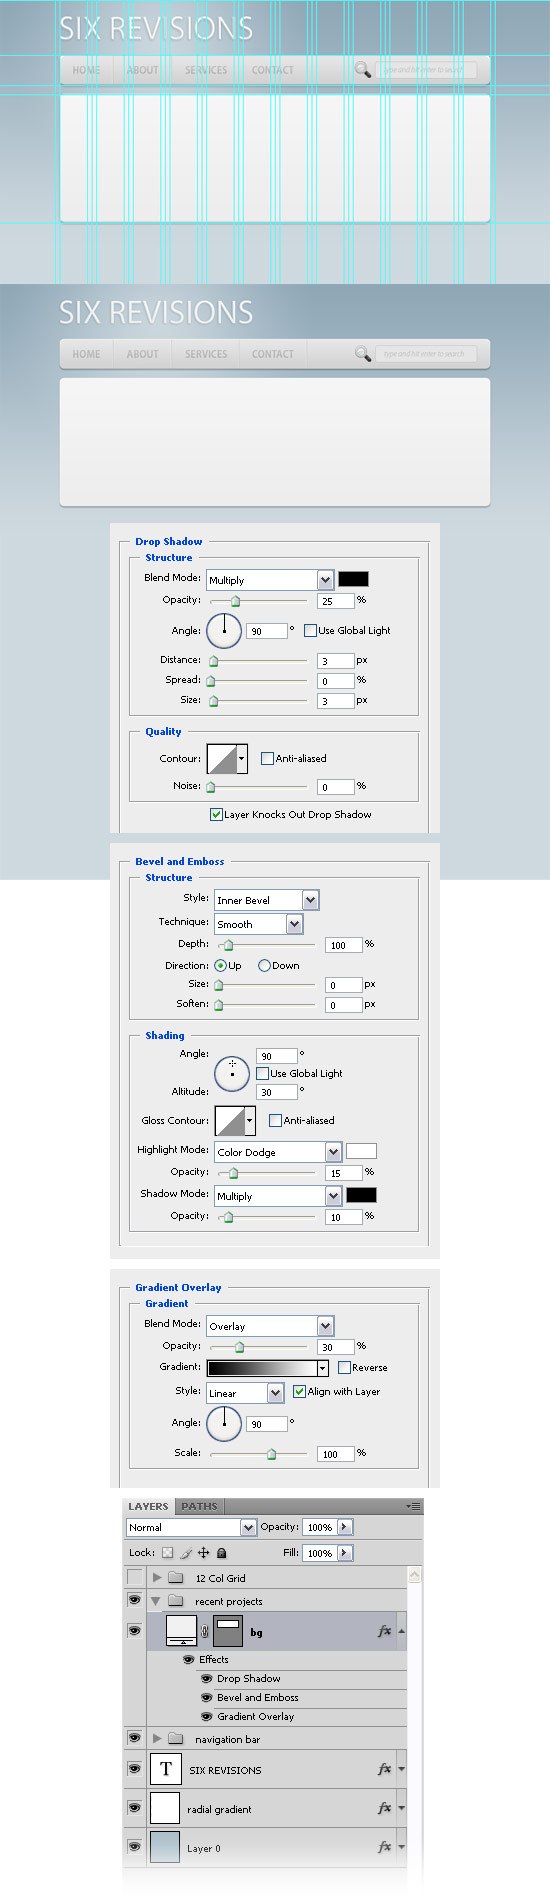
Building the “Recent Projects” area
17 Create a new group and name it “recent projects“.
18 Select the Rounded Rectangle Tool (U), set the Radius to 10px and create a rounded rectangle with the dimensions 960px by 280px using the color #F1F1F1.
19 Double-click on this layer to open the Layer Style window and use the settings from the following image. Name this layer “bg“.
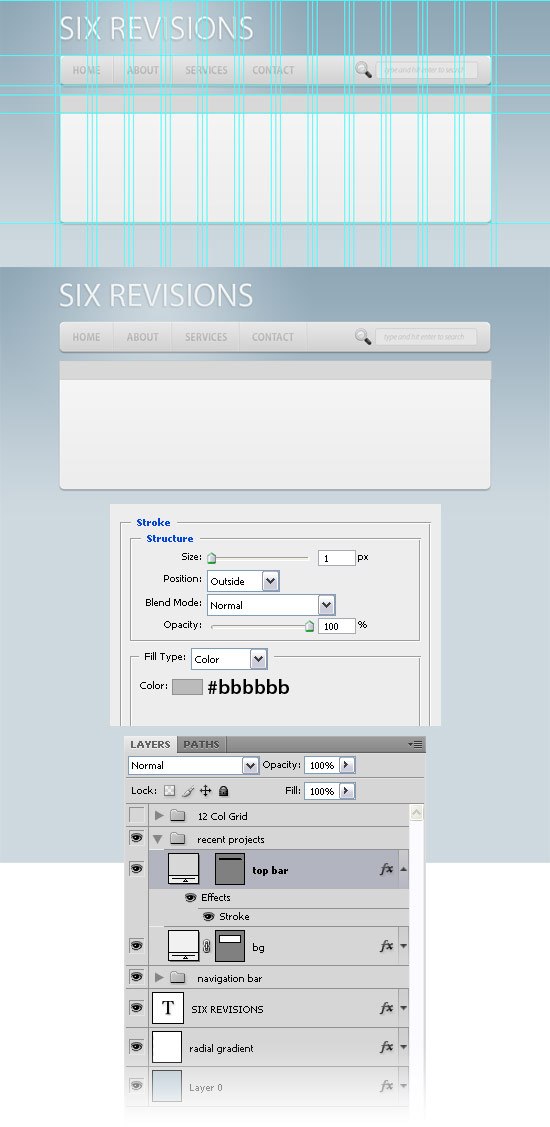
20 Select the Rectangle Tool (U) and create a rectangle with the dimensions 960px by 40px, using the color #D8D8D8.
21 Double-click on this layer to open the Layer Style window and use the settings from the following image. Move this rectangle at the top of your rounded rectangle, and name this layer top bar.
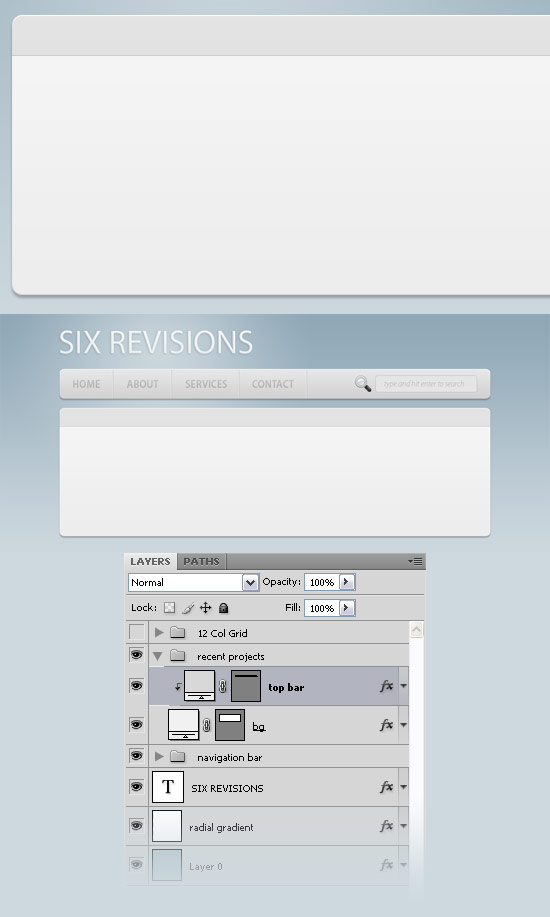
22 The top corners of our big rounded rectangle are not rounded anymore because of the rectangle we have created at the previous steps. However, we can correct this very easily.
Right-click on the top bar layer and select Create Clipping Mask. Now the top bar layer is using the layer beneath it as a mask and the top corners of our rectangle are rounded again.
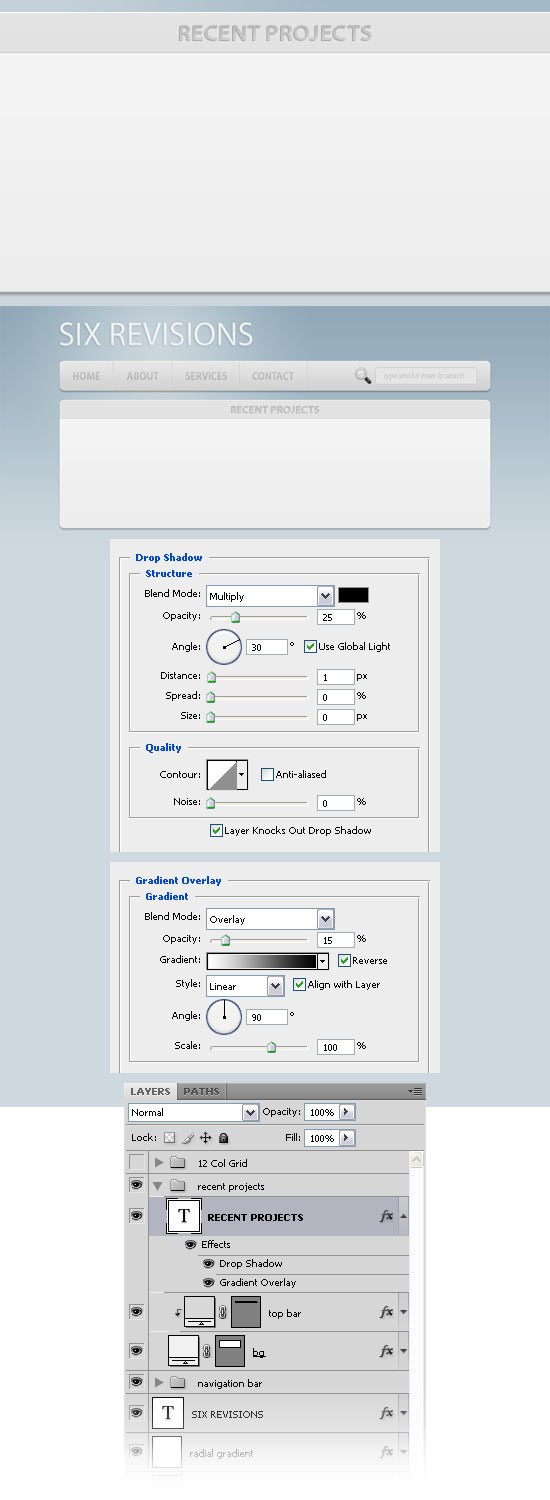
23 Select the Horizontal Type Tool (T) and write the text “RECENT PROJECTS” in the middle of your top bar, using the color #C5C5C5. Double-click on this layer to open the Layer Styles window and use the settings from the following image.
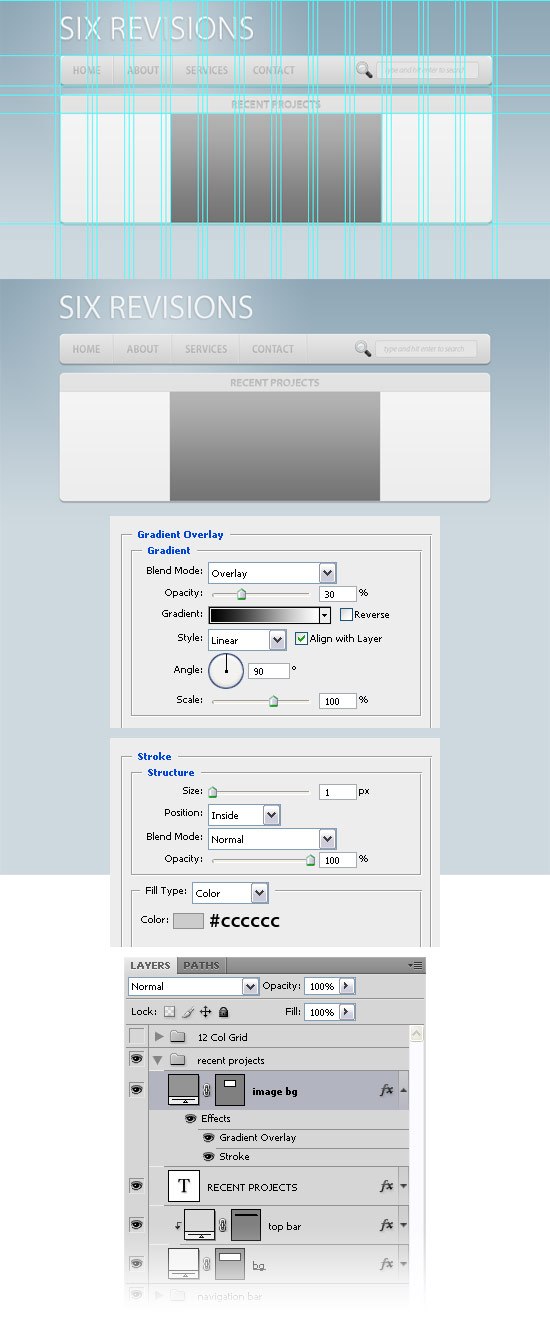
24 Select the Rectangle Tool (U) and create a rectangle with the dimensions 460px by 240px, using the color #949494.
Double-click on this layer to open the Layer Styles window and use the settings from the following image. Put this rectangle in the middle of your “Recent Projects” area.
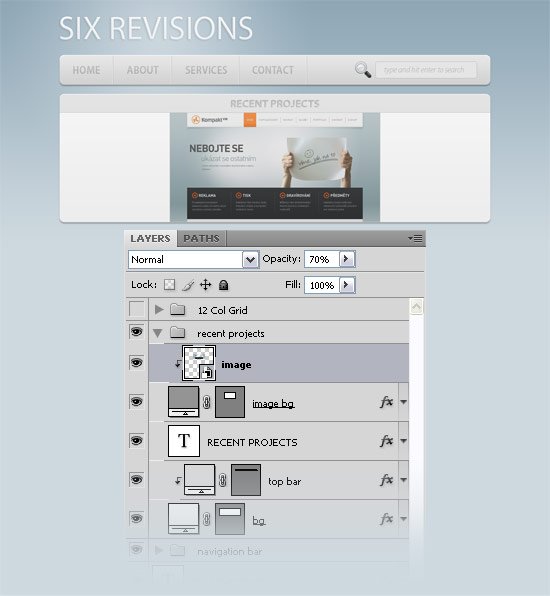
25 Open an image that you like in Photoshop and move it into your document using the Move Tool (V). Put this image above the rectangle from the middle of the “Recent Projects” area.
Right-click on this layer and select Create Clipping Mask, then name it image, and lastly, set its opacity to 70%.
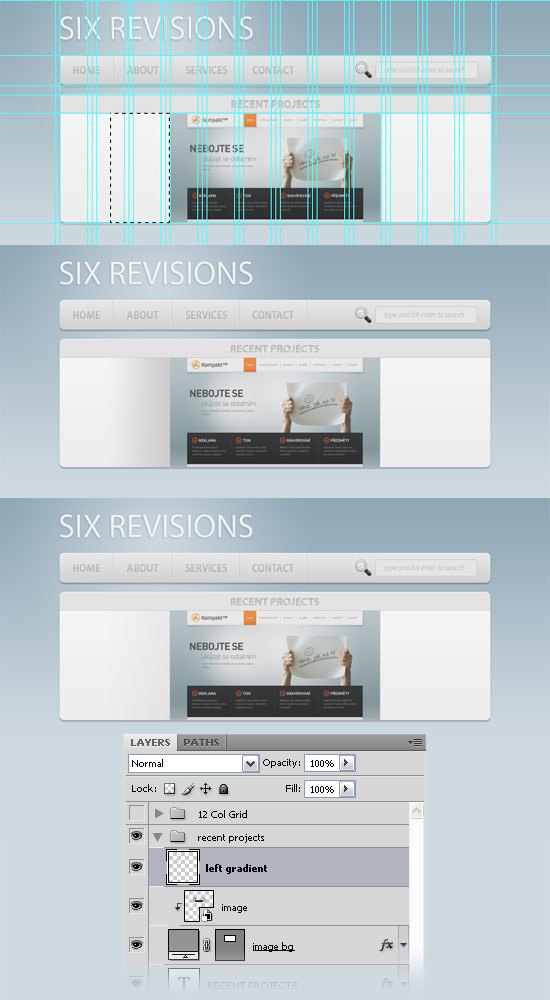
26 Create a new layer, turn your guides on (toggle your guides’ visibility on and off using Ctrl+;), select the Rectangular Marquee Tool (M) and create a selection like I did in the following image. Select the Gradient Tool (G) and drag a #CCCCCC to transparent linear gradient from the right side of your selection to the left side. Name this layer left gradient and set its opacity to 30%.
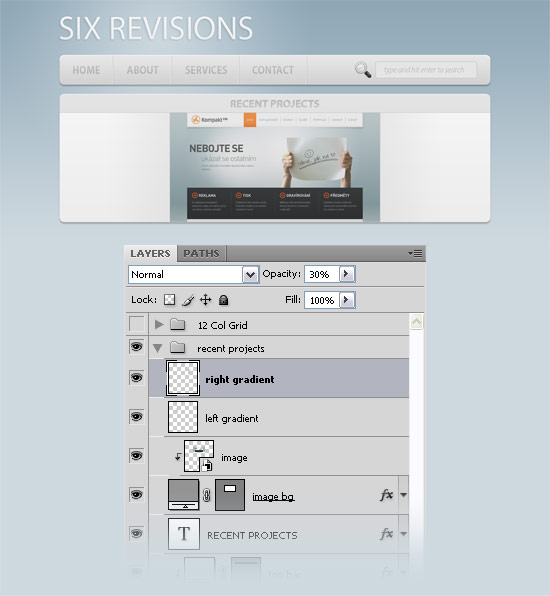
27 Duplicate the left gradient layer (Ctrl+J), and then go to Edit > Transform > Flip Horizontal.
Move this layer in the right side of your “Recent Projects” area and name it right gradient.
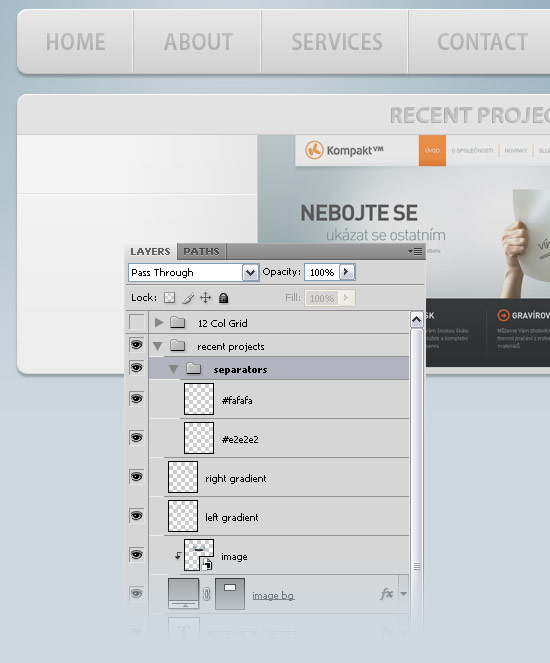
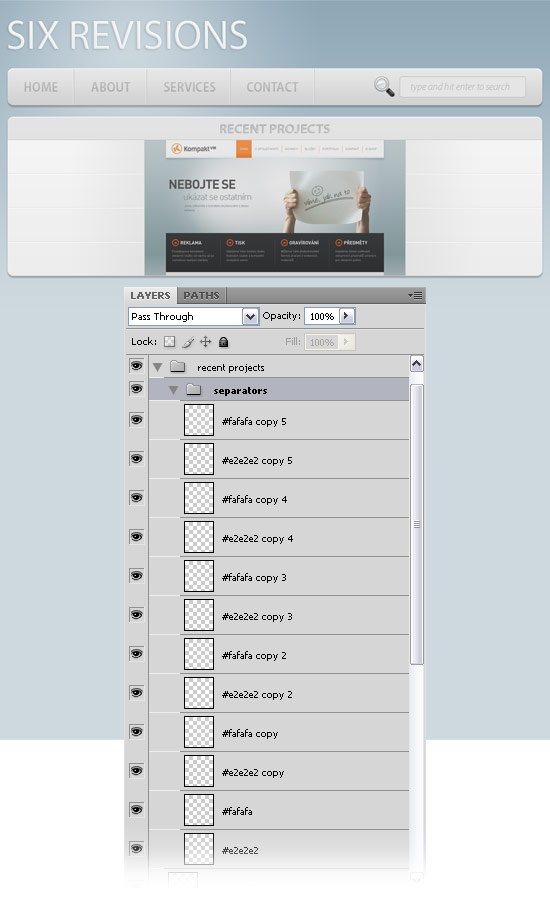
28 Create a new group and name it separators. Select the Line Tool (U), set the Weight to 1px and create a horizontal line with the width of 240px, using the color #E2E2E2. Create a new line beneath the first one, but this time use the color #FAFAFA.
29 Duplicate the two lines which you have created at the previous step five times (hold down the Ctrl key, select the two layers by clicking on them in the Layers Panel, and drag them over the Create a new layer icon at the bottom of the Layers Panel).
30 Use the Move Tool (V) to arrange all these lines so you have three separators on each side of your Recent Projects area.
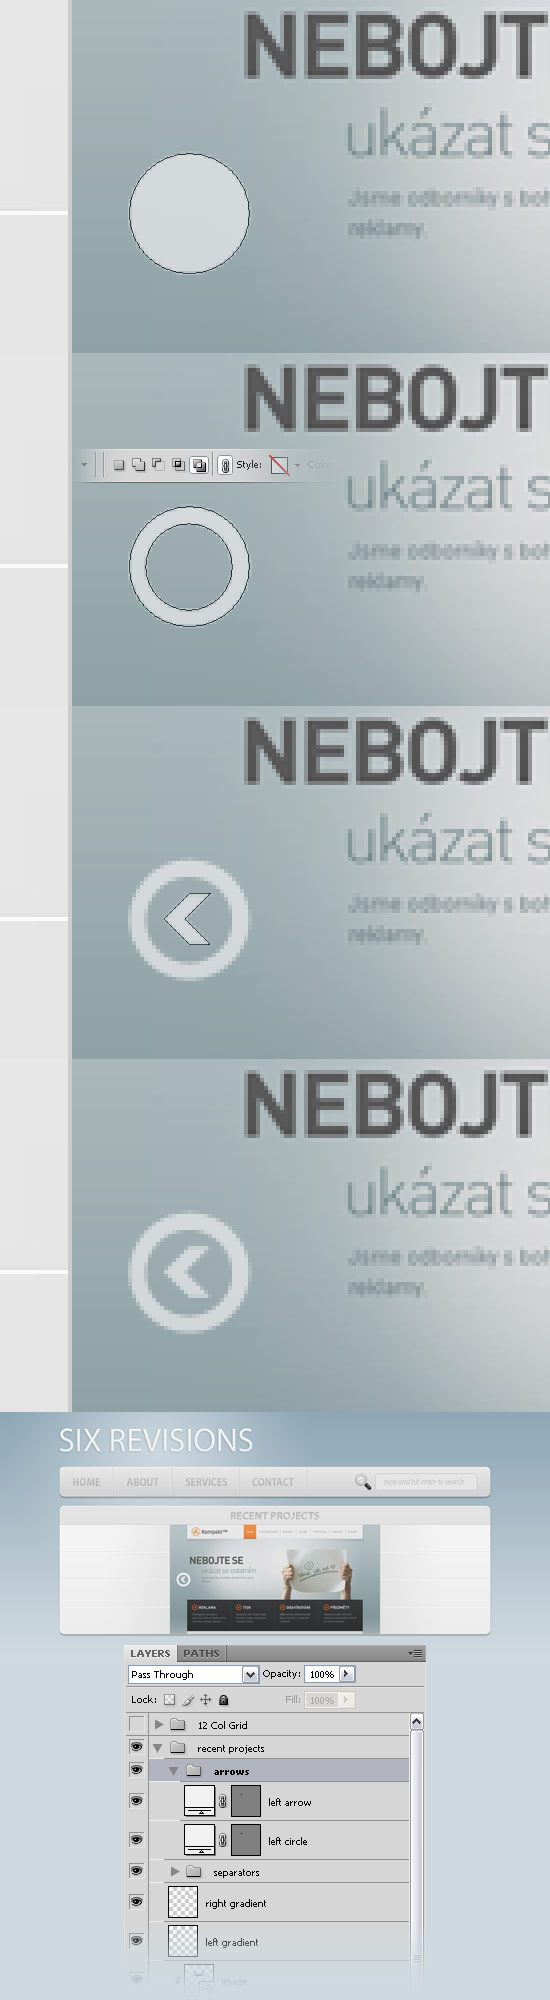
31 Create a new group and name it arrows. Select the Ellipse Tool (U), hold down the Shift key to ensure that you’ll be creating a perfect circle, and create a small circle in the left side of your image from the “Recent Projects” area using the color #F1F1F1.
32 Click on the Exclude overlapping shape areas button from the Options bar, hold down the Shift key, and create a smaller circle inside the first one.
To move the circle while you are creating it, hold down the Spacebar. Name this layer left circle.
33 Select the Custom Shape Tool (U), right-click on your image and select an arrow that you like. Hold down the Shift key and create an arrow inside your circle, using the color #F1F1F1.
Name this layer left arrow.
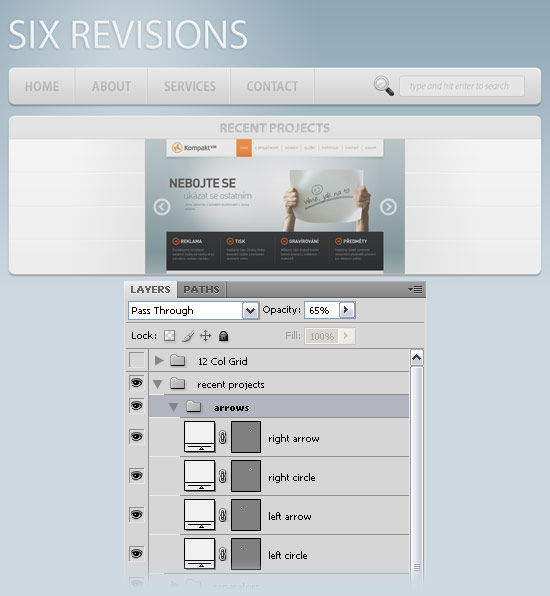
34 Hold down the Ctrl key and click on the left circle and left arrow layers to select them. Then drag these two layers over the Create a new layer icon on the bottom of the Layers Panel to duplicate them.
35 Go to Edit > Transform > Flip Horizontal and move these two layers in the right side of your image.
Change the name of these layers to right circle and right arrow. Then set the opacity of the arrows group to 65% so that all layers inside this group will have a 65% opacity.
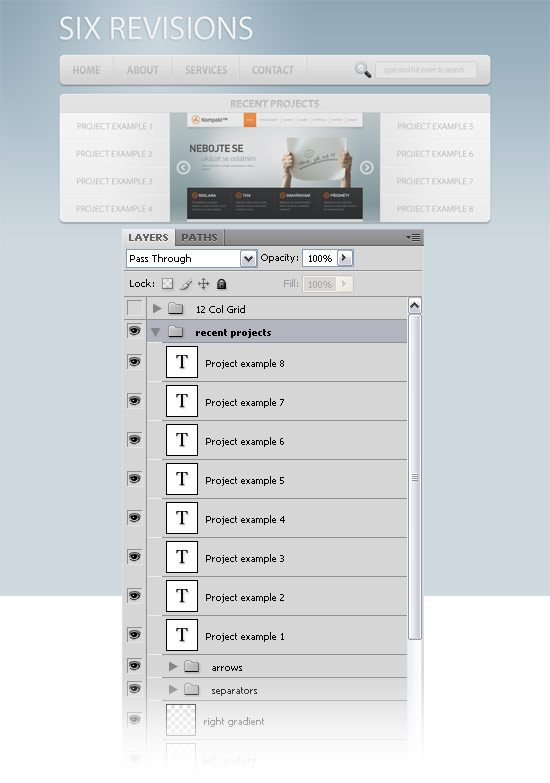
36 To cap off the Recent Projects area design, select the Horizontal Type Tool (T) and add the text for your recent project items using the color #ADADAD.
Making the “Services” area
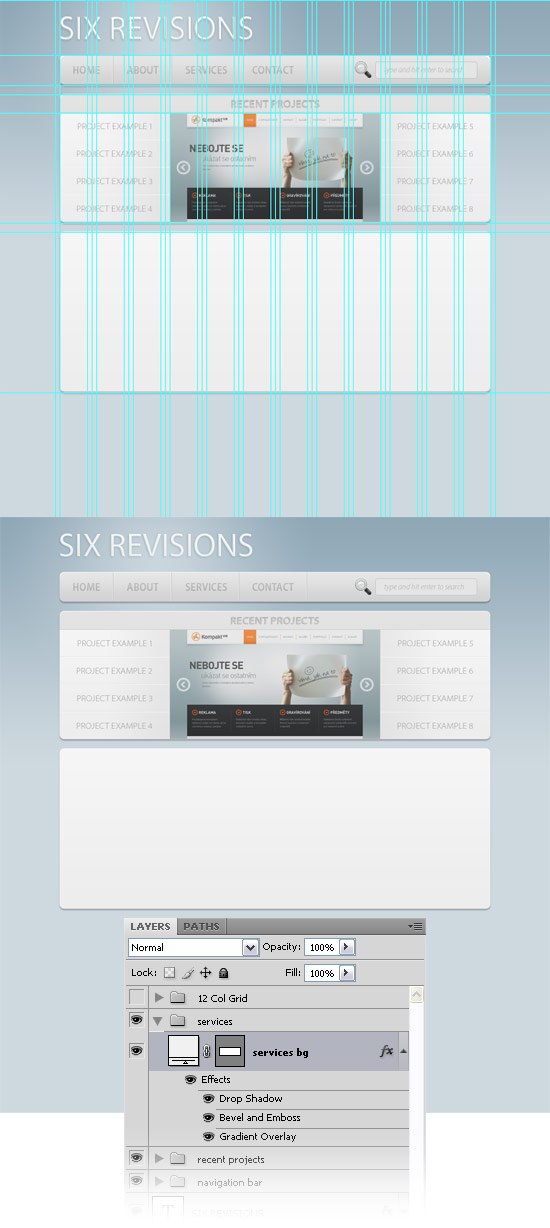
37 Create a new group and name it services.
Select the Rounded Rectangle Tool (U), set the Radius to 10px, and create a rounded rectangle with the dimensions 960px by 350px, using the color #F1F1F1. Name this layer services bg.
38 We are going to use the same layer style that we have used for the background of the “recent projects” area. Open the recent projects group, right-click on the bg layer and select Copy Layer Style.
Then right-click on the “services bg” layer and select Paste Layer Style.
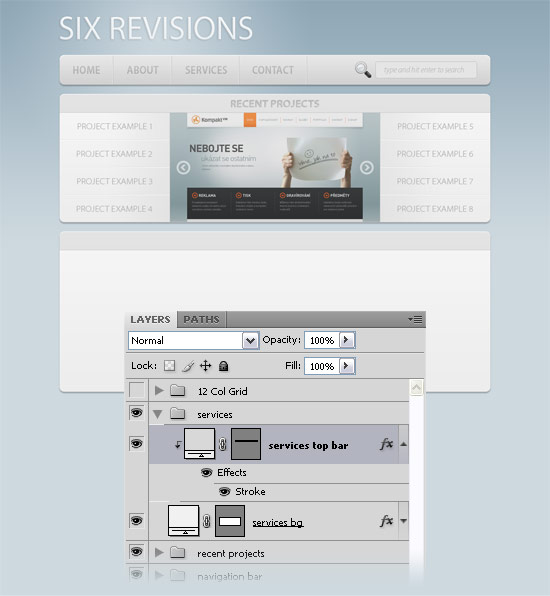
39 Select the Rectangle Tool (U) and create a rectangle with the dimensions 960px by 40px using the color #D8D8D8. Name this layer services top bar.
Put this layer at the top of your rounded rectangle, right-click on it and select Create Clipping Mask.
40 Right-click on the top bar layer from the recent projects group and select Copy Layer Style. Then right-click on the services top bar layer and select Paste Layer Style.
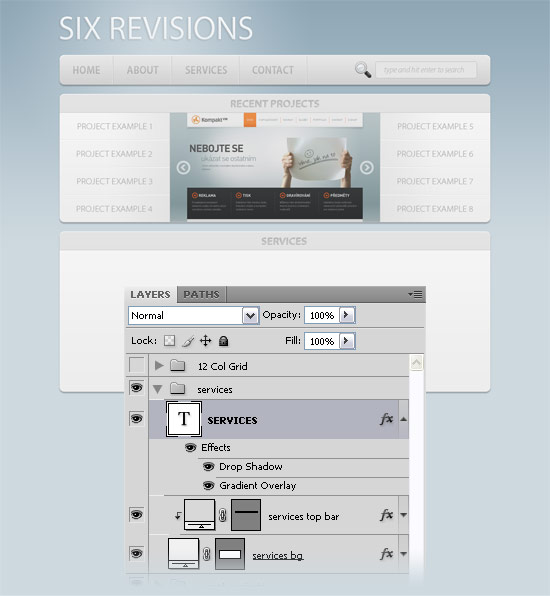
41 Write the word “services” in the middle of your top bar, using the color #C5C5C5 and use the same layer style that you have used for the Recent Projects area text.
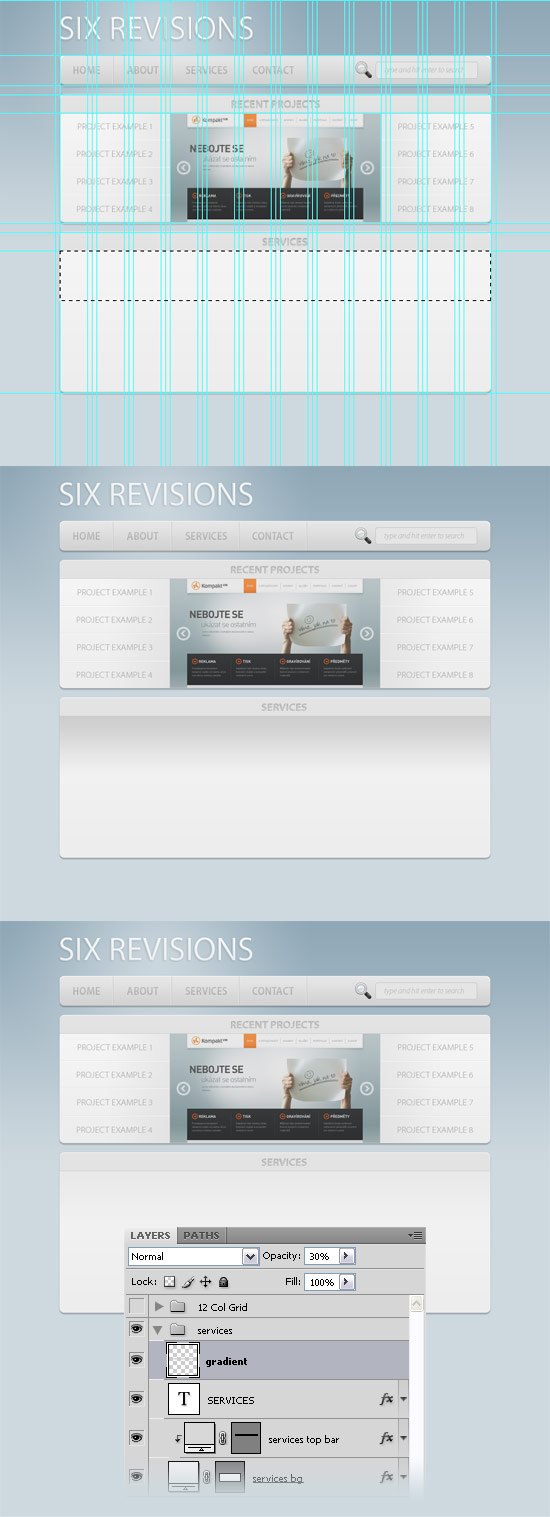
42 Create a new layer, turn your guides on, and use the Rectangular Marquee Tool (M) to create a selection like I did in the following figure.
Then use the Gradient Tool (G) to drag a #CDCDCD to transparent gradient from the top of your selection to the bottom. Name this layer as gradient and set its opacity to 30%.
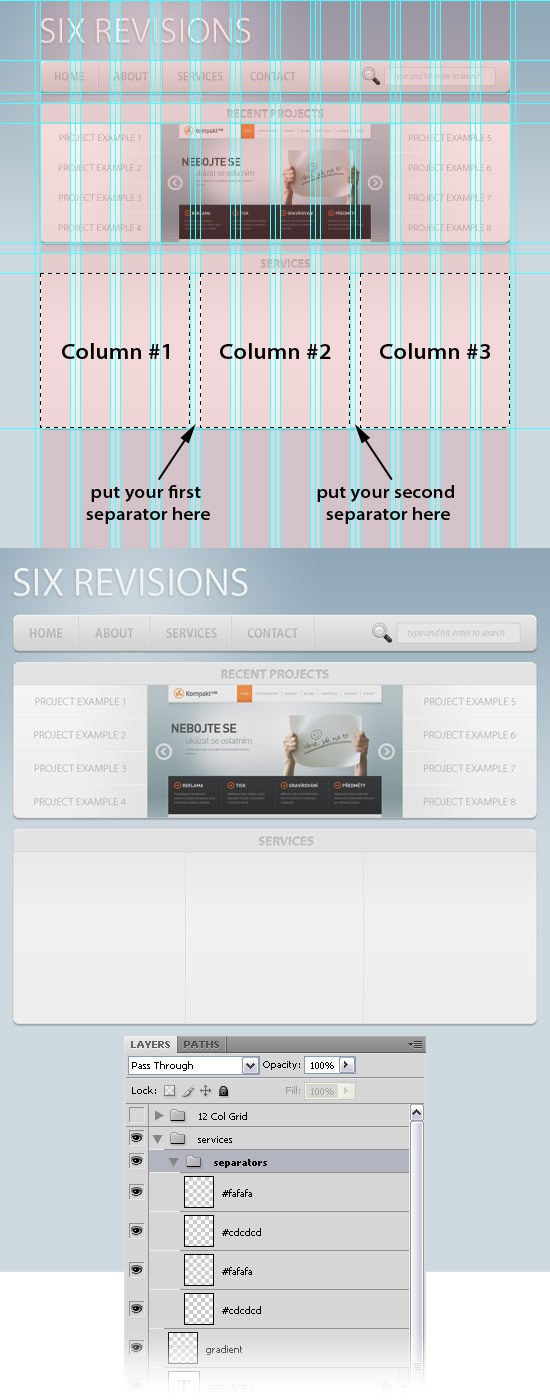
43 Now we are going to split the Services area into three columns; the 960 Grid System makes this very easy for us. Each column will have the width of 300px (that means four red bars).
44 To delineate these three columns, we will use two separators.
First, create a new group and name it separators. Then select the Line Tool (U), set the Weight to 1px and create two vertical lines – the first one using the color #CDCDCD and the second one using the color #FAFAFA. Duplicate these two lines, select the Move Tool (V) and arrange your separators to create your three columns.
Check out the following image to see where you have to put your separators.
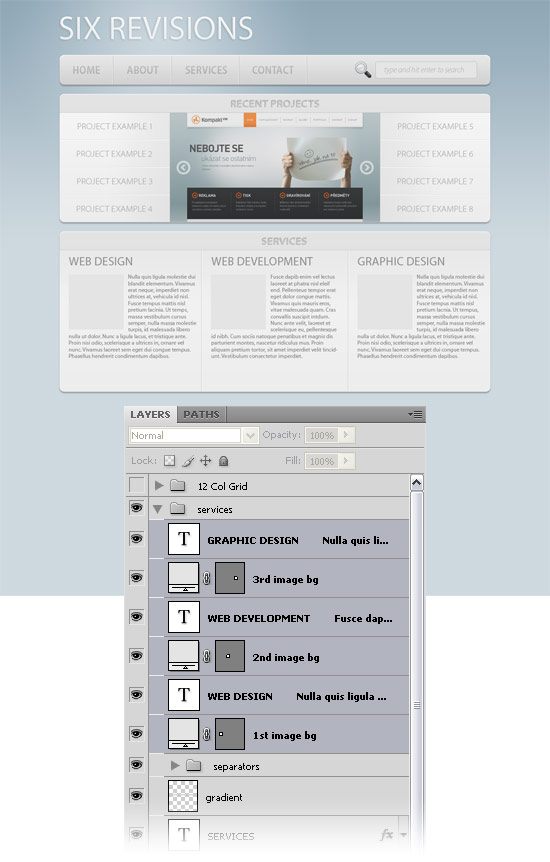
45 Select the Horizontal Type Tool (T) and add some text in each of your three columns, using the color #8E8E8E. I have also created three squares that can be replaced with images.
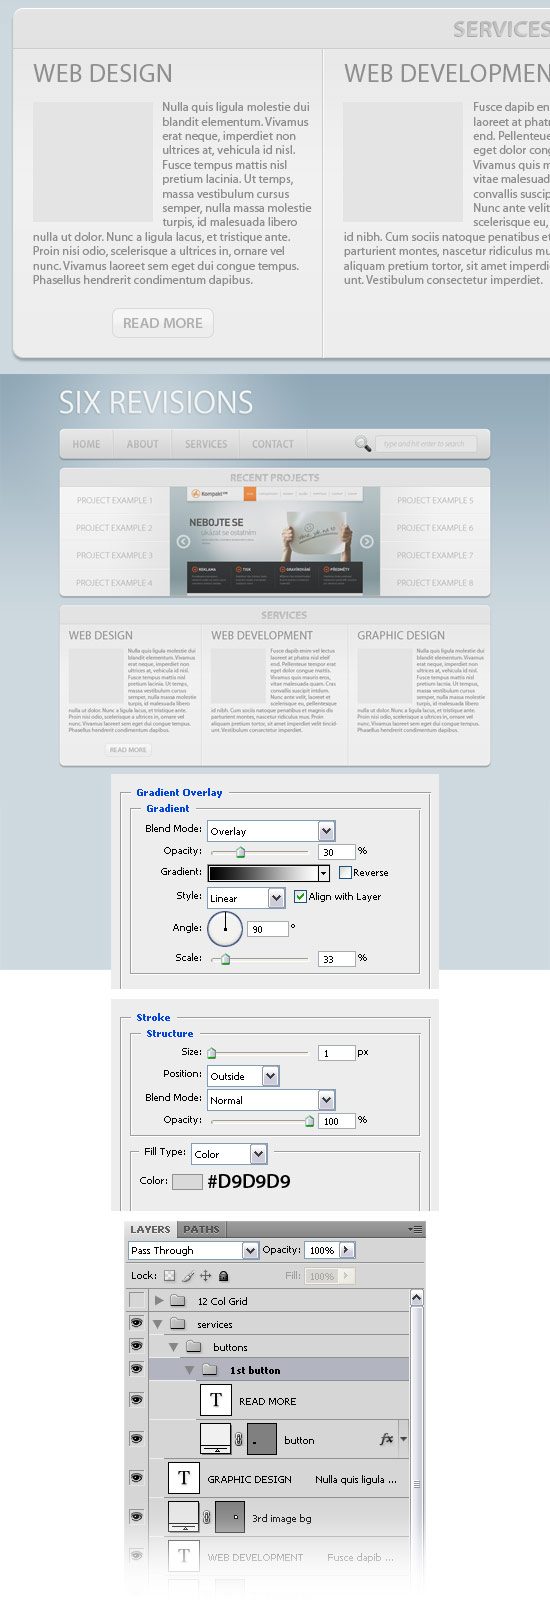
46 Create a new group and name it buttons. Create a new group inside the previous one and name it 1st button.
47 Select the Rounded Rectangle Tool (U), set the Radius to 6px and create a rounded rectangle with the dimensions 100px by 28px, using the color #F1F1F1. Double-click on this layer to open the Layer Style window and use the settings from the following image.
48 Select the Type Tool (T) and write the text “read more” on your button, using the color #AFAFAF.
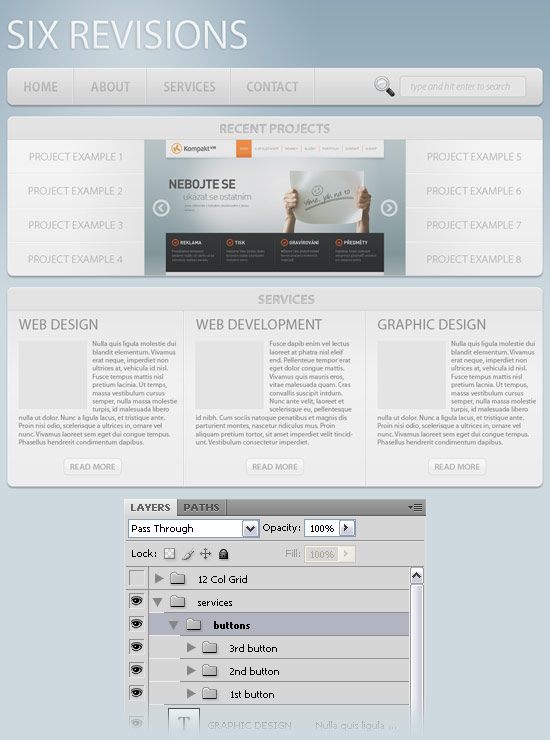
49 Duplicate the 1st button group two times (right-click on the group in the Layers Panel and then pick Duplicate Group). Then put these two new buttons in the middle of the second and third columns.
Creating the “About us” area
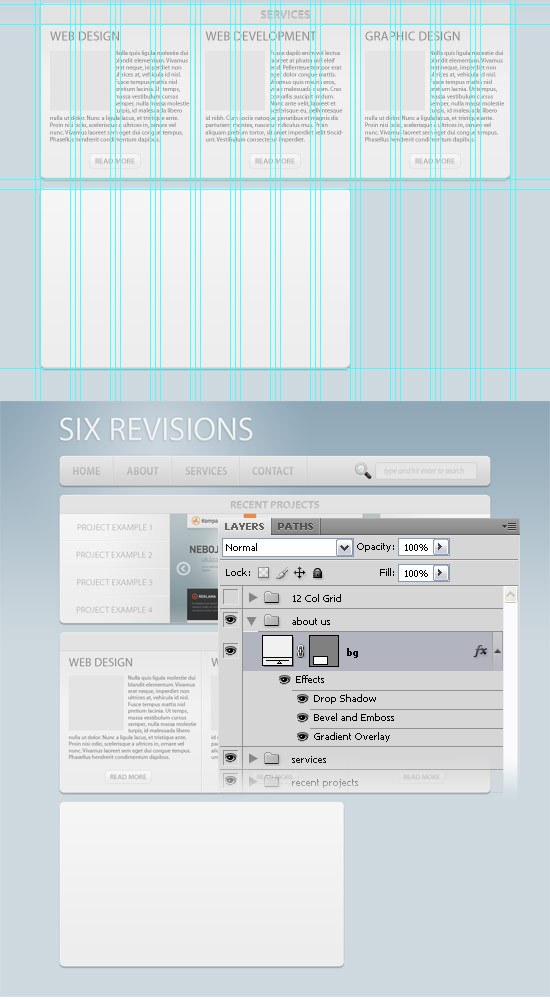
50 Create a new group and name it “about us“.
Select the Rounded Rectangle Tool (U) and create a rounded rectangle with the dimensions 620px by 360px. Name this layer bg. Right-click on the “services bg” layer and select Copy Layer Style.
Then right-click on the “bg” layer and select Paste Layer Style.
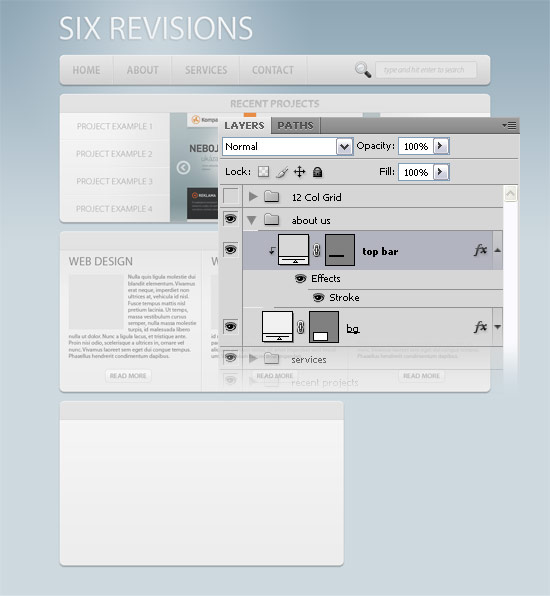
51 Select the Rectangle Tool (U) and create a rectangle with the dimensions 620px by 40px, using the color #D8D8D8. Name this layer top bar.
Right-click on the “services top bar” layer and select Copy Layer Style. Then right-click the top bar layer and select Paste Layer Style. Right-click on this layer and then select Create Clipping Mask.
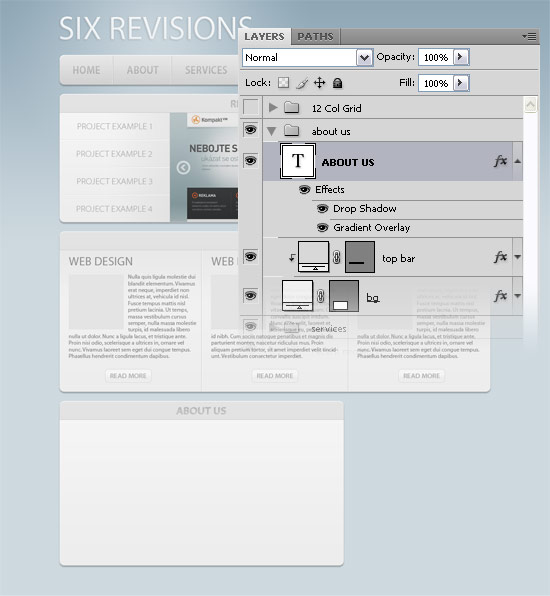
52 Select the Type Tool (T) and write the words “about us” at the top of your rounded rectangle using the color #C5C5C5.
Copy the layer styles from the services text layer and paste it to this layer.
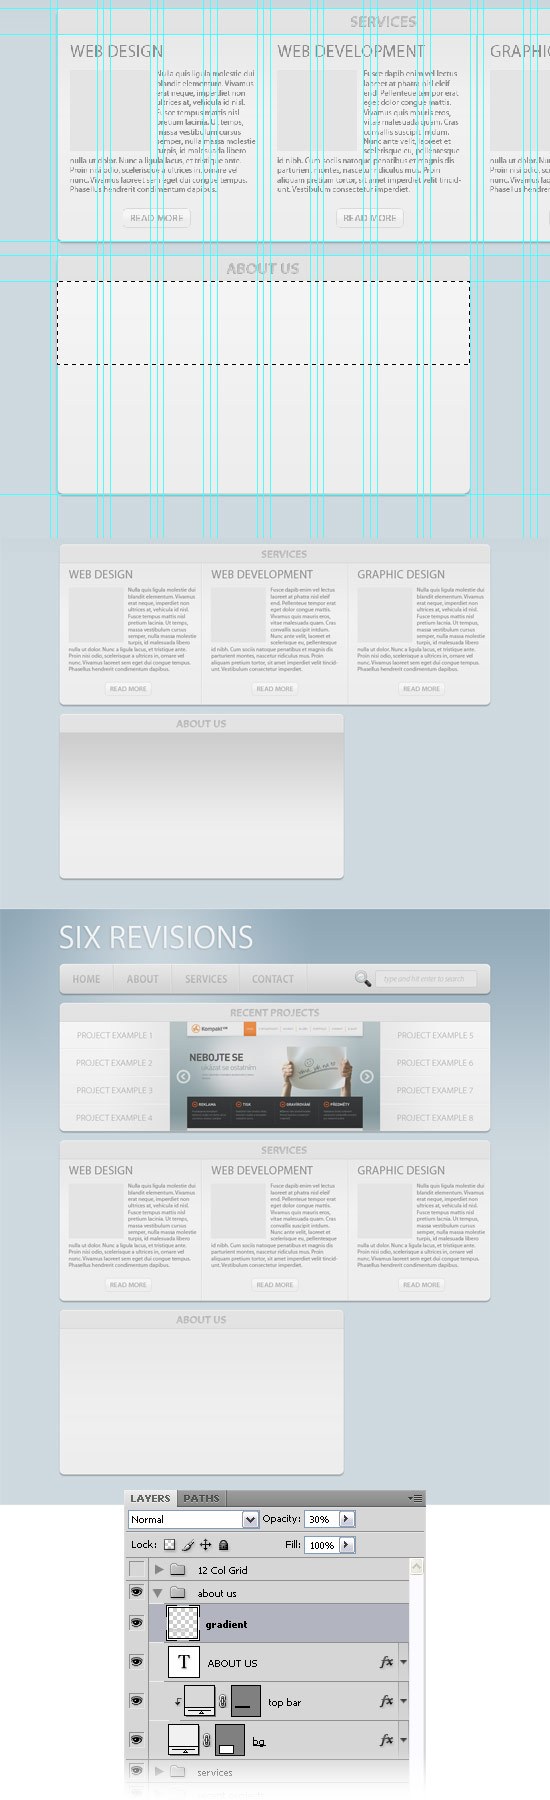
53 Turn the guides on and use the Rectangular Marquee Tool (M) to create a selection like I did. Use the Gradient Tool (G) to drag a #CDCDCD to transparent linear gradient from the top of your selection to the bottom. Name this layer “gradient” and set its opacity to 30%.
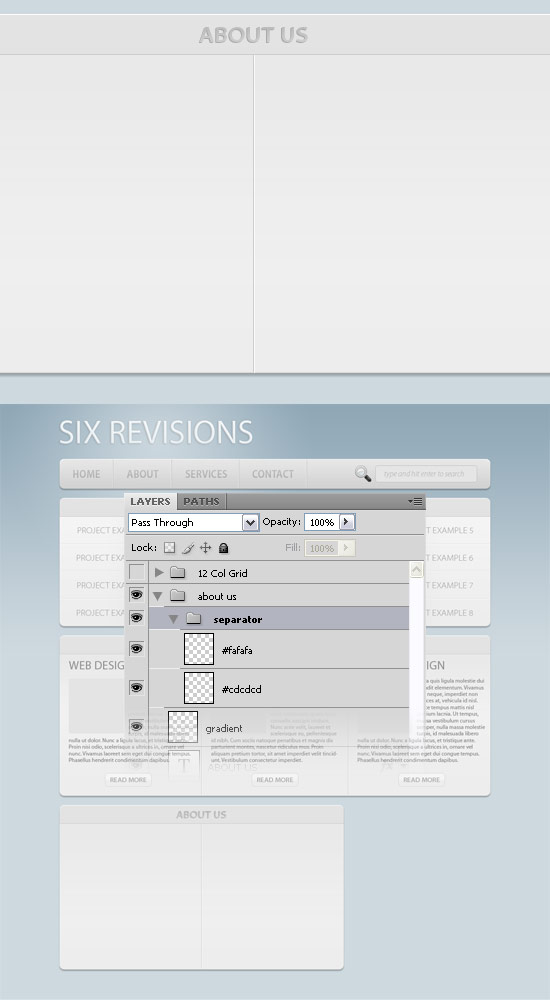
54 Create a new group and name it “separator“.
Use the Line Tool (U) to create two vertical lines – the first one using the color #CDCDCD and the second one using the color #FAFAFA. Put this separator in the middle of your About us area.
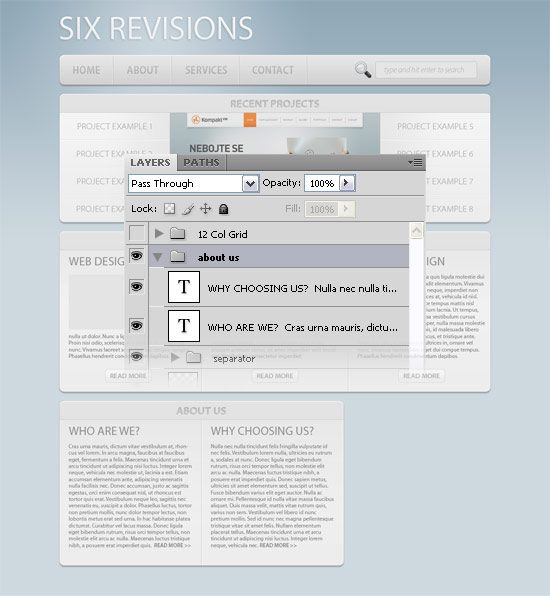
55 Select the Horizontal Type Tool (T) and add some text inside the two columns from the “About us” area, using the color #8E8E8E.
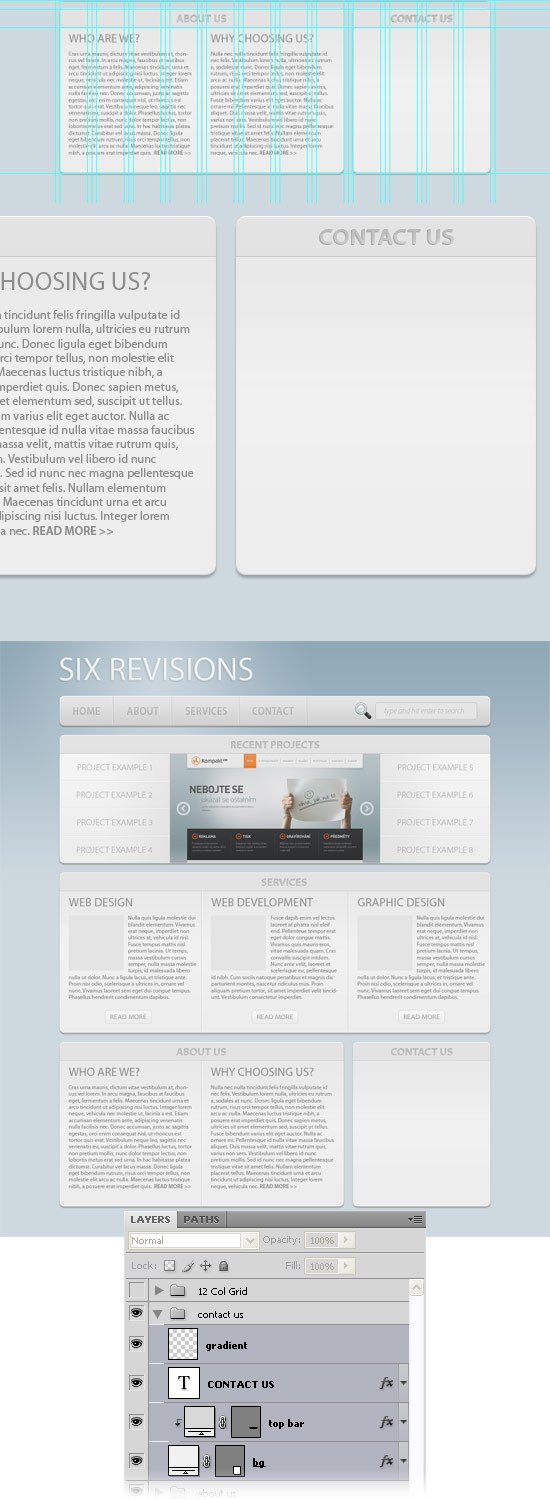
Designing the “Contact us” area
56 Create one more rounded rectangle like we did for the “Recent Projects”, “Services” and “About us” areas. The dimensions of this rectangle should be 300px by 360px.
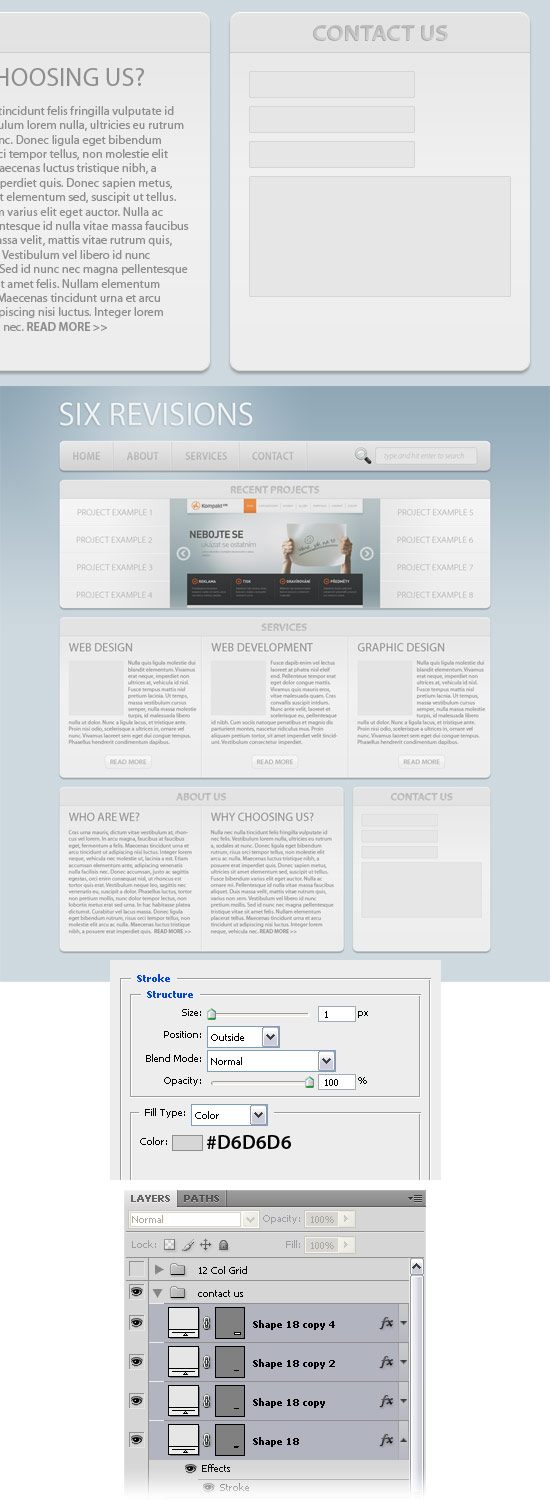
57 Now, we are going to design the contact form for our website. Select the Rectangle Tool (U) and create three rectangles like I did, using the color #E6E6E6. Add a Stroke layer style to each of these rectangles using the settings from the following image.
58 Select the Horizontal Type Tool (T) and write the words “name“, “email” and “subject” next to the first three rectangles using the color #BBBBBB.
Making the “send” button
59 Next up, we are going to create the send button.
First, select the Rounded Rectangle Tool (U), set the Radius to 6px and create a rounded rectangle with the dimensions 100px by 30px, using the color #EFEFEF. Double-click on this layer to open the Layer Style window and use the settings from the figure below. Select the Type Tool (T) and write the word “send” on your button, using the color #AFAFAF.

A simple footer
60 Finally, to finish off – get the Horizontal Type Tool (T) out and add a copyright statement in the footer of your layout, using the color #999999.
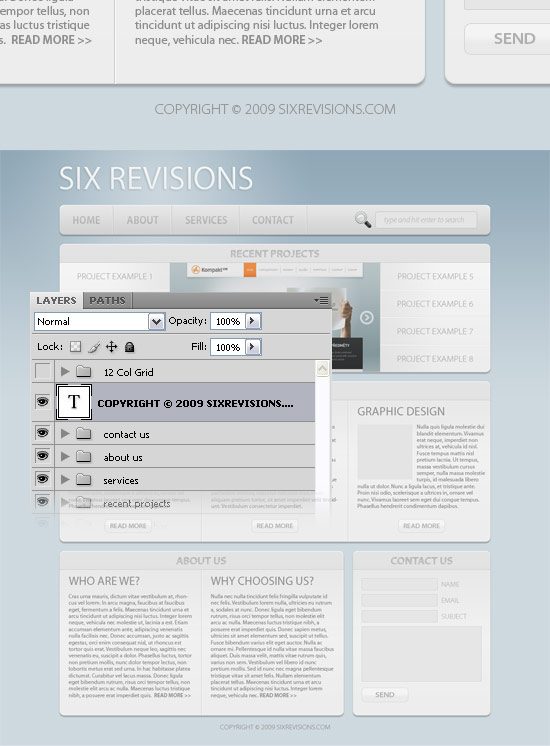
We’re done!
I hope you enjoyed this tutorial.
You can view the final result image below or you can click on it to see the full-scale version of the web layout.
Download the source file
If you’d like to check your work with the Photoshop file used in this tutorial, download the file below.
- light-and-sleek-layout.zip (ZIP, 1.24MB)
Share your work on Flickr!
Did you follow along this tutorial? If you did, why don’t you show us what you were able to do by joining the Six Revisions Flickr group and uploading your own work?
Related content
- How to Create a Clean Blog Design with Photoshop
- How to Make a Green & Sleek Web Layout in Photoshop
- How to Design a Space Futuristic Gallery Layout in Photoshop
-
 President of WebFX. Bill has over 25 years of experience in the Internet marketing industry specializing in SEO, UX, information architecture, marketing automation and more. William’s background in scientific computing and education from Shippensburg and MIT provided the foundation for MarketingCloudFX and other key research and development projects at WebFX.
 -

WebFX is a full-service marketing agency with 1,100+ client reviews and a 4.9-star rating on Clutch! Find out how our expert team and revenue-accelerating tech can drive results for you! Learn more
Make estimating web design costs easy
Website design costs can be tricky to nail down. Get an instant estimate for a custom web design with our free website design cost calculator!
Try Our Free Web Design Cost Calculator
Share this article


Web Design Calculator
Use our free tool to get a free, instant quote in under 60 seconds.
View Web Design CalculatorMake estimating web design costs easy
Website design costs can be tricky to nail down. Get an instant estimate for a custom web design with our free website design cost calculator!
Try Our Free Web Design Cost Calculator


