
 In the Getting Started with Drupal guide, you were given a step-by-step walkthrough for setting up and using Drupal, the popular open source content management system (CMS). In this article, I’ll share some basic tips and tricks geared towards new Drupal developers.
Introduction
If you haven’t already, consider first reviewing the official Drupal.org reference on core concepts before delving into Drupal.
If you don’t have Drupal set up yet, go over to the Getting Started with Drupal guide. 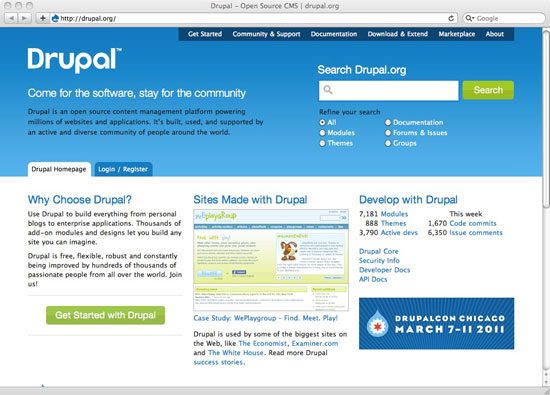 Another place to find help is in the Drupal Forums; search for the specific answer to your specific question. Here are some tips for posting to the Drupal forums.
While Drupal is not for everyone, it is a popular platform that helps accomplish many common goals for website owners.
1. Install Drupal Quickly Using Profiles
Drupal comes in the “core” format as a standard download from the official Drupal.org website (click the “Download” button on the Download page at Drupal.org for the most recent version). However, if you have a specific need, say a news site, or a political campaign site, consider using one of the contributed profiles or distributions that have been built off thousands of hours of development time from other coders. These pre-configured bundles have certain modules, themes, or pre-built functions that allow you to get your ideal site up and running, instead of you having to physically download and configure multiple modules to extend Drupal core.
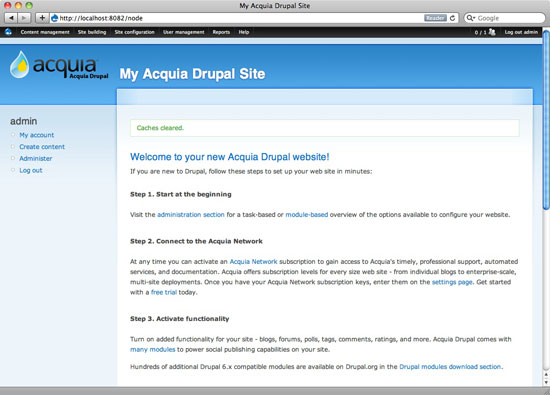 I use the Acquia distribution, which comes with many modules for a complex site with moderate to high functionality.
2. User #1 is Important
Take good care to record the username, password, and e-mail address of the first user (typically the username will be admin). This is user number 1 — the owner of the site — and you’ll periodically return and log in as this first user to keep the site up-to-date. It’s also important to secure this account because it holds a lot of power over your Drupal installation.
3. Know the Basic URL Structure for Drupal Content
Once you have a basic installation in place, you may create new content by navigating directly to this URL (where example.com is your domain name):
Content within a Drupal site are called nodes. A node may be an image, a page, a story, an announcement, a poll, a web form, or a job listing — you can think of a node as a single unit of content. For example, if you want to create a new page, you can go to the following URL:
 Once you create content, you can find its nid (node ID), which is a unique identifier for that node, in the URL.
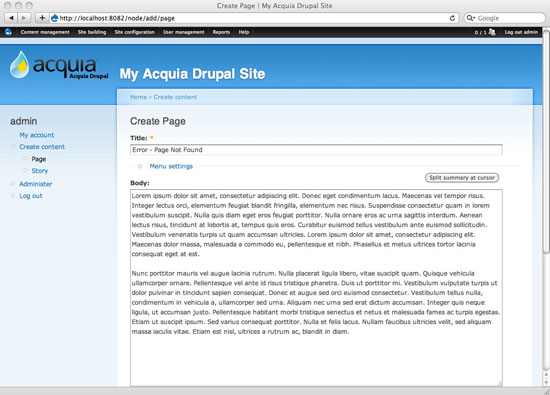
To determine the nid through the URL of a web page, just use the following URL structure as a guide, where [nid] is the node ID of that page:
[nid]
In the following image, the nid is 2. 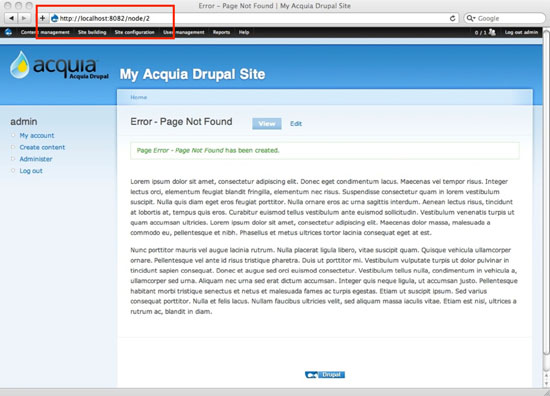
4. Google Is Your Friend
Right from the beginning, you may have installation errors, mostly because your local development environment, i.e. your installation of Drupal in your computer, may be different from your remote hosting environment, i.e. where your Drupal site will be hosted.
Whenever you encounter a Drupal issue, Google is your friend. Copy and paste the exact error message, and consider putting the search term inside double quotes so that Google does a literal search.
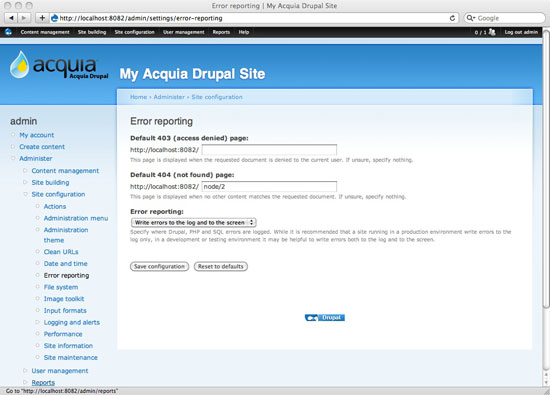
5. Customize Your Site’s Error Pages
The default error messages Drupal gives your users when they navigate to a web page that they don’t have permission to view or a page that is not found can be intimidating and not really useful. Configure the language of your 403 Access Denied and 404 Page through this URL:
6. How to Troubleshoot the “White Screen of Death”
When you navigate to your Drupal site and you see nothing but a white blank screen, playfully nicknamed white screen of death (probably as a reference to Microsoft Windows’s blue screen of death), it typically means that Drupal encountered a PHP error. Many things can cause this, and it usually has to do with a development error. Even a missing semicolon can trigger the white screen of death.
If you find yourself with a completely white screen (blank), you’ll want to enable PHP error reporting so you can find where the issue is being encountered. For more information, read this Drupal.org tutorial called White Screen of Death.
7. Install the Administrator Menu Module
If you didn’t use an installation profile and you aren’t using Drupal 7, install the Administration menu module (admin_menu). 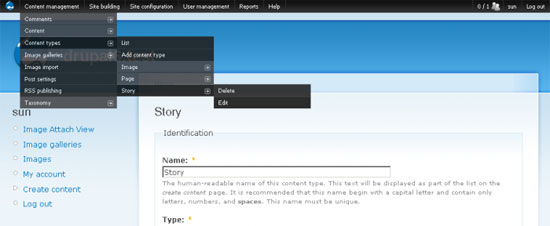 It’s is a dropdown menu at the very top of the administration pages that links to admin pages, making it easier to find your way through the maze-like administration pages.
8. Back Up Your Database in a Safe Location
The Backup and Migrate module is perfect for grabbing an SQL dump of your database for storage or if you need to move it from one host to another. I recommend storing these backups on a separate location of your site. For small sites, you can even get away with emailing the SQL file to yourself and storing it there.
Not recommended for security purposes (since if your email account is compromised, then your site’s content will be exposed), but it just illustrates the types of places you can store your SQL files.
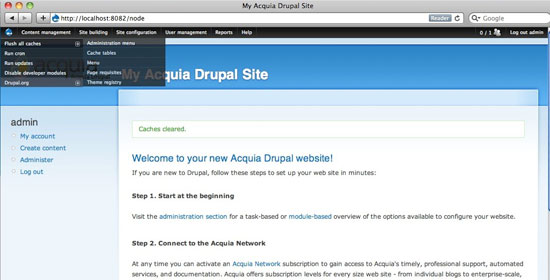
9. When Something Goes Wrong, Flush Your Cache
Drupal creates caches of your content so that every time a page is requested, it doesn’t have to generate it dynamically all of the time, reducing the amount of PHP processes and SQL queries being made, which in turn increases the performance of your Drupal site. However, if your site acts strangely or you can’t see your theme edits during development, use the Flush Cache function. Flushing your cache clears out your Drupal cache and allows the site to rebuild itself with up-to-date information.
 The Drupal cache can also be disabled temporarily while you’re still in development under the Site Configuration page, under Performance.
10. Explain the Concept of Content Types to Clients
One of the biggest challenges for your client is to understand the different types of content on their site. From the perspective of the end-user, a page of staff biographies, or a page of announcements, or a page of recent events all behave the same, so it might be difficult, for example, to explain why a Story is different from a Page. But in order for end-users to really use their system properly, this conversation needs to happen at hand-off.
One thing to note is that they can create new types of content by going to Administer > Content types > Add content type (tab). From Drupal’s point of view, breaking down the site into unique content types, the site owner can easily make cascading changes for one content type. You could, for example, change commenting settings for a Page that would be different for a Story.
Each of the different nodes within a specific content type may then be displayed on the front-facing sections of the Drupal site using Views (more on this later). By understanding what kinds of content will be used on the site, you can create “content types” to match. When you do the initial discovery phase with your client, help them break down all the content they want on their site into specific “content types.” 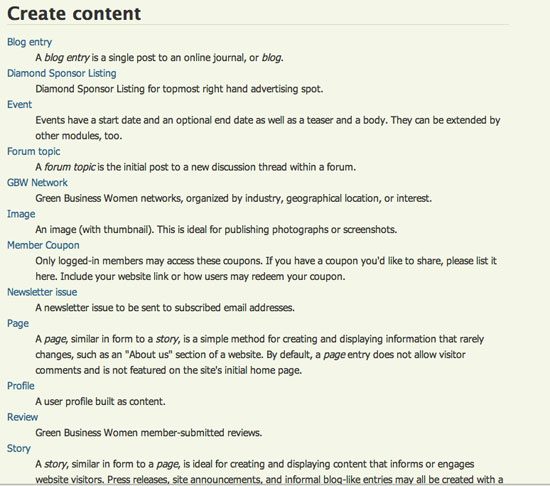
11. Understand User Roles and Permissions
Once you have a grasp of all the modules you’ll be using, as well as the content types, then you may specify what types of users (“roles”) you’ll have on the site and which permissions those roles have. 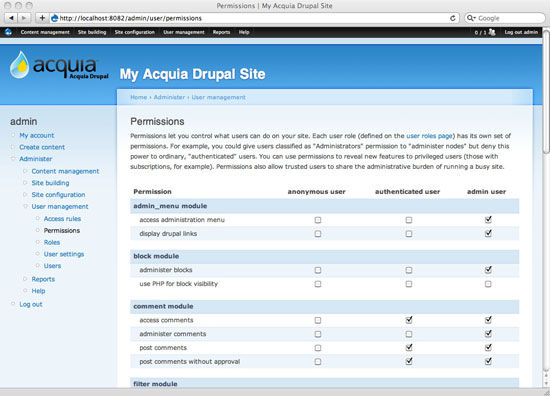 You can configure user permissions via:
The default Drupal user roles are as follows:
- anonymous user – a user that is not logged in
- authenticated user – a user that is logged in and has an account on your Drupal site
- admin user – a user that is logged in, has an account on your Drupal site, and has rights to administer the website
12. Understand Basic Theme Development Concepts
There are hundreds of themes available for free download, paid download, or for unique customization from a design comp created by your web designer. If I’m doing a custom theme, I usually use a modified version of the Framework Theme as a base, with all additional graphic design elements (PNGs, backgrounds, icons, photos and logos) coming from Photoshop and with CSS edits directly to the stylesheet. A theme is made up of these major parts:
- *.info – has information about the different regions of the page; consider adding new sections such as a “Content Top” section or a “Bottom Footer” section if needed
- page.tpl.php – the default template for pages
- node.tpl.php – the default template for how a specific node will display; custom nodes can be created by creating a file using the following naming convention: node-[nodename].tpl.php (e.g. node-blog.tpl.php or node-product.tpl.php)
- template.php – pulls the layout together and calls different functions into the overall layout of each page
- style.css – all custom CSS for the site
There may be some additional *.php files such as block.php and/or comment.php if you or the theme designer decide to specify the layout of those elements.
13. Know Some Places for Getting Free Themes
Sometimes your client will be able to find a theme that fits most of their needs, and you can do additional customizations to the CSS. If they would like to download public themes, I typically encourage clients to visit the following links.
Free Themes:
Premium Themes:
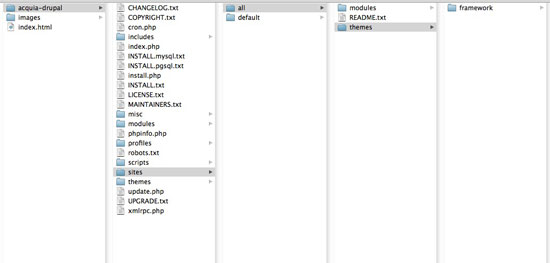
14. How to Install a Downloaded Theme
To enable a downloaded theme, first move the unpacked file into a new directory:
/sites/all/themes/[themedirectoryname]
 Next, choose your theme from Administer > Site Building > Themes or by navigating directly to this URL:
Choose which theme you would like as the Default and which ones you would like to have Enabled. If a theme is Enabled, it means it can be set as the Default. 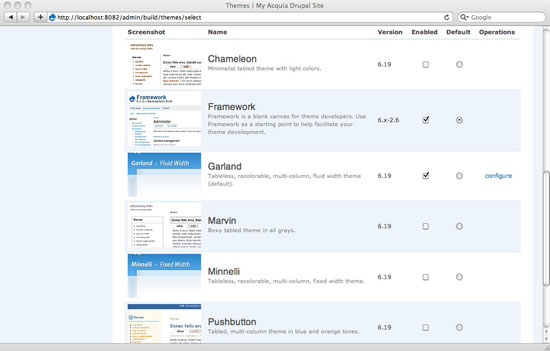
15. Don’t Forget to Set Up Basic Site Information
Some standard information gets collected and displayed on your basic Drupal setup, such as the name of the website, the e-mail address for any system messages, the slogan, mission statement, and text in the footer message. 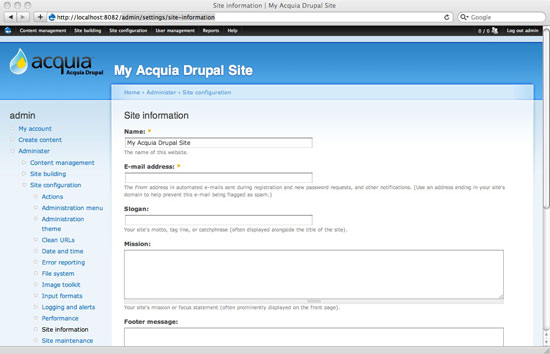 This information can then be called using the Drupal API in case you need to print them out on certain Drupal pages. You can set and view these through Admin > Site configuration > Site information or by navigating directly to this URL:
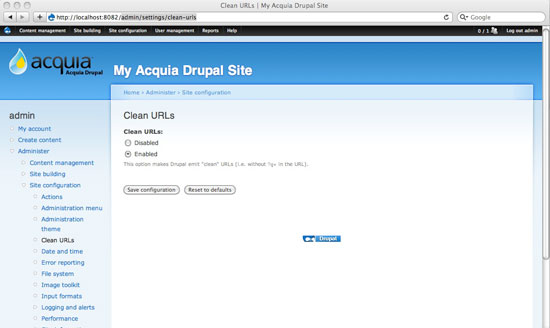
16. Always Set Up Clean URLs
Drupal, by default, uses unfriendly system URLs to refer to your web pages. For example, navigating to a page may look like this: http://example.com/?q=node/1. Not very user-friendly or indicative of what the content is.
It is also not very good for SEO. To solve this issue, enable Clean URLs by going to Administer > Site configuration > Clean URLs or navigating directly to the following URL:
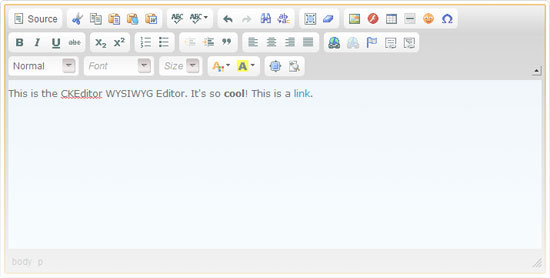
17. Install a WYSIWYG Module
Your clients will demand an interface that allows them to compose their content easily and without knowledge of coding. Creating content should be as easy as writing and sending an email. There should be a GUI for doing things like bolding, italicizing, underlining text, creating bulleted lists, creating hyperlinked text, and so forth.
I’m recommending the CKEditor module for handling WYSIWYG functionality. It is the successor of the popular FCKEditor. Try out the demo and read the project’s documentation for more info.
 CKEditor comes in two parts:
- A “wrapper” module: CKEditor for Drupal
- The main required component, which you can download directly from the CKEditor website
18. Deploy with a Contact Form
Most of our clients require some sort of web form, and it’s usually going to be a contact form for their site users to be able to message them. Drupal core has a pre-built contact form, and it’s best to enable it and make necessary changes to it prior to deploying the Drupal site. First, you must enable the Contact module, which is an optional core module.
Then, to configure the contact form, go to Administer > Site Building > Contact Form or navigate directly to:
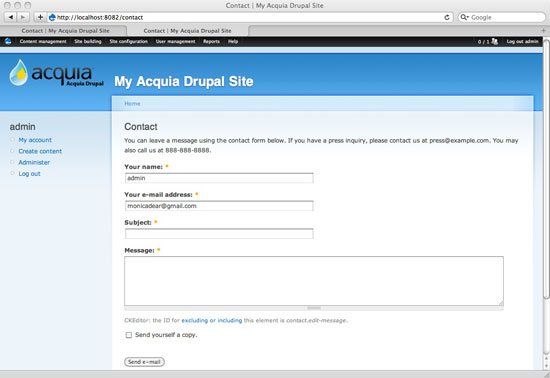 Notice in the image above that you may edit many parts of the contact form, such as the different types of contact form categories available and different addresses to send a message, depending on its category. This could be very useful for multi-user sites, where you can have a category regarding advertising forwarded to the sales team and a question about technical support forwarded to the IT guys.
19. Manage Your Navigation Menus
Drupal comes pre-configured with three menu blocks:
- Navigation links – provided by Drupal and the main interactive menu with personalized links
- Primary links – major sections of the site, typically like the tabs across the top of the page
- Secondary links – an additional set of links for items like legal notices, contact details and other less-important navigational elements
You may manually edit these menus by using your Menu manager via Administer > Site building > Menus > List menus or navigating directly to:
Alternatively, you can add a new node, and from the data entry page, you may add that new node directly to the menu: just specify the desired menu and the text to appear within that menu. 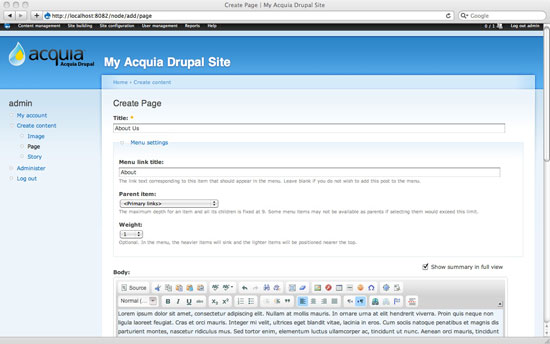
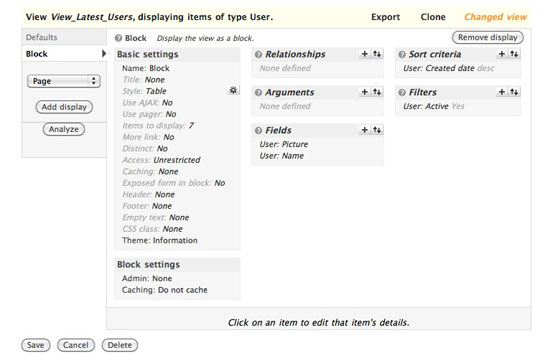
20. Learn to Love Views
Using Views gives you a terrific amount of control over the tedious task of creating displays of your information. Using the Views editor, you can filter your available nodes and publish them in various styles such as tables, grids, or lists, and sort them in the manner of your choosing. For example, from a content type of “people”, you can use Views to specify any of the following from the same set of records:
- A grid of faces that is an additional “block” to be placed on a Team page
- An alphabetical list by name and department on a Departments page
- An office-only list of e-mails and phone numbers on an Administration page
 I recommend reading this tutorial called A Beginners Guide to Using Views. Also, the Getting Started with Drupal: A Comprehensive Hands-On Guide walks you through the creation of a view.
21. Partner with a Hosting Provider You Trust
Obviously, if your hosting provider does not have experience or a reputation in hosting Drupal, consider switching to a host with excellent tech support and a responsive team that understands your concerns, as well as those of your clients. I use Nexcess for all of our Drupal sites — their control panel is easy to use, they’re knowledgeable, their tech support team responds quickly, and they are set up to grow along with you.
22. Create a Checklist for Launch
After you’ve configured your modules and fine-tuned your chosen theme, finished your data entry and user testing for quality assurance, it’s time to soft-launch the website. Here is my final checklist of items to review prior to the launch.
Cron job
Ask your hosting provider to help you set up a cron job.
They will direct you either to a back-end manager or they will walk you through the process. Drupal’s default cron script is located at /cron.php.
Rewriting htaccess
Specify if your site will be something like this: www.example.com or something like this: example.com.
These are considered different “entities” by search engines and the process of creating a main (canonical) URL is an ongoing challenge.
Setting the base URL
If, after you rewrite htaccess, you find yourself still having issues, review the site’s base URL. Seek this line in settings.php:
# $base_url = 'http://www.example.com'; // NO trailing slash!
And change the $base_url variable assignment to your own website.
Performance caching
Once live, your website may benefit from caching to improve page response times. Use the caching function to help reduce calls to the database with every single user, on every single page. If you turned it off during development, turn it on again by going to Admin > Site configuration > Performance or navigating directly to:
Conclusion
There is a lot of ground to cover when you’re first getting accustomed to using Drupal.
Find the types of functions that most match what your clients ask for, and then find a set of well-supported modules (multiple downloads, responsive maintainer) to use in your toolkit for deploying content management systems.
Related Content
-
 President of WebFX. Bill has over 25 years of experience in the Internet marketing industry specializing in SEO, UX, information architecture, marketing automation and more. William’s background in scientific computing and education from Shippensburg and MIT provided the foundation for MarketingCloudFX and other key research and development projects at WebFX.
 -

WebFX is a full-service marketing agency with 1,100+ client reviews and a 4.9-star rating on Clutch! Find out how our expert team and revenue-accelerating tech can drive results for you! Learn more
Make estimating web design costs easy
Website design costs can be tricky to nail down. Get an instant estimate for a custom web design with our free website design cost calculator!
Try Our Free Web Design Cost Calculator
Share this article


Web Design Calculator
Use our free tool to get a free, instant quote in under 60 seconds.
View Web Design CalculatorMake estimating web design costs easy
Website design costs can be tricky to nail down. Get an instant estimate for a custom web design with our free website design cost calculator!
Try Our Free Web Design Cost Calculator


