

 If you’re building a website for a client or yourself that requires a number of images to be presented in a gallery format — for example, if you’re a web designer, photographer, sculptor, painter or graphic designer — Drupal has some out-of-the-box solutions to help you organize and present your information. Professionals who work on a visual medium often need help presenting (and possibly monetizing) their work, and an online gallery is a great way to do this. Perhaps you could also make the images available as physical products or digital downloads in an online store as an added option.
This guide will show you how to develop a portfolio/image gallery website using the popular content management system, Drupal.
Prerequisites
For this guide, you will need basic working knowledge of Drupal and a clean installation of the Acquia Drupal distribution ready to go. The following guide might be helpful to read for new Drupal users:
Here are the Drupal modules we’ll be using:
- Acquia Drupal distribution
- Content Construction Kit
- Views
- Simplenews
- Optional: Ubercart (for e-commerce)
Below, you’ll be instructed to navigate to certain sections of Drupal. You will have to replace http://example.com with your domain name where you have Drupal set up. Let’s get started!
Step 1: Gather the Information to Display
Use Drupal’s module manager to enable the following modules:
- Image (enables you to use images)
- Image Gallery (pre-built gallery functionality)
- Image Attach (functionality to add images to pages and other types of posts)
- Image Import (to batch upload a number of image files)
- Lightbox 2 (if desired)
- CCK Content (to edit the “Image” content type)
- CCK Number (to add new number fields to the “Image” content type)
- CCK Text (to add new text fields to the “Image” content type)
The typical project to display in a gallery-style website would have specific fields that display only on a per-project basis. These could include things like the image itself, the image’s title, the creation date, the medium and a description of the image. Go through the body of work and identify the types of information that are important to display for each item in the gallery.
You may be able to skip this step if all you need is the title and a description of the gallery item. If you need more, then use CCK to add new fields to the “Image” content type by navigating to:
Admin menu > Content management > Content types > Edit Image > Manage fields
Direct URL:
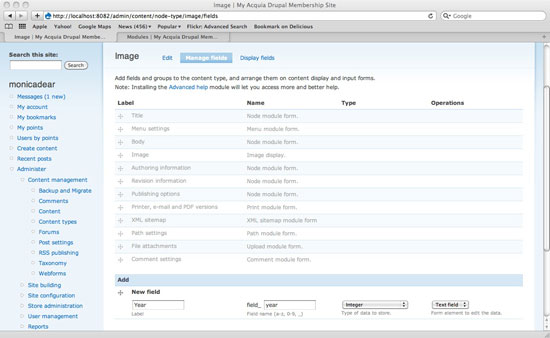 This will enable you to collect more information about each image (again, specific to the type of gallery being displayed). Note that the name of each gallery may be specified in advance by going to:
Admin menu > Content management > Image galleries > List
Direct URL:
If no gallery has been prepared yet, you can create one by going to:
Admin menu > Content management > Image galleries > Add Gallery
Direct URL:
Step 2: Import the Images
You may upload images one at a time using the “Add image” functionality:
Admin > Content management > Create content > Image
Direct URL:
The default version lets you add a title and description.
Because we enabled the Image Attach module, you can therefore attach an image to this node. The following describes how to upload an image from your hard drive, and assign it to its gallery (if it’s destined to have one). If you have a number of photos to upload at the same time, you could first put them all in one folder on your desktop or hard drive to make them easier to organize and access.
Next, go to the Image Import settings:
Admin > Site configuration > Images > Image import
Direct URL:
Follow the instructions to create a “temporary” folder somewhere in your web server. You may need to use FTP to create the folder (especially if you are using shared hosting). 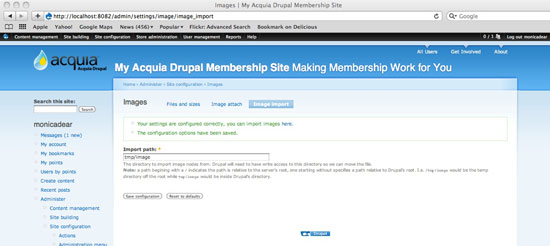 Here is the equivalent tmp/image file on the hard drive:
 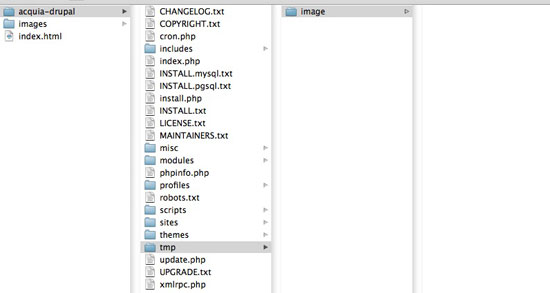 FTP all of the images that you want to make available to your Drupal website, putting them in this temporary directory.
Note that you can automatically create new image galleries by creating sub-directories. For example, with the path tmp/image/gallery1/foo.jpg, the image foo.jpg would be part of gallery1. 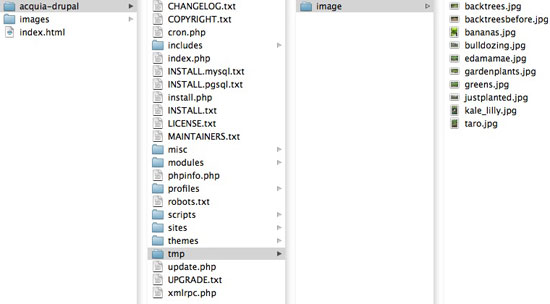 Next, take those images from the temp folder and import them to your Drupal website:
Admin > Content Management > Image Import
Direct URL:
You can use the Select button at the very top of the list to auto-select all of the images.
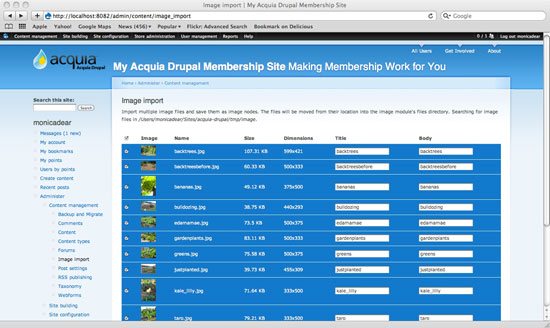 At this point, specify a new “Title” and “Body.” After the images have been imported, you’ll receive a confirmation.
 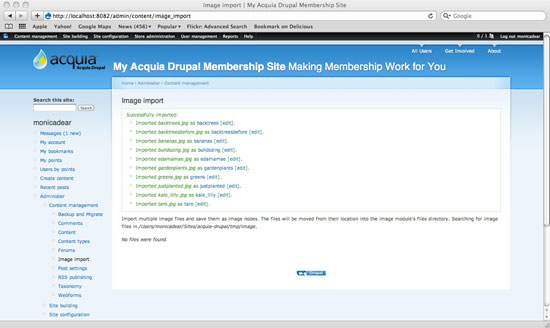 You can always refer to the content overview section by going to:
Admin > Content management > Content > List
Direct URL:
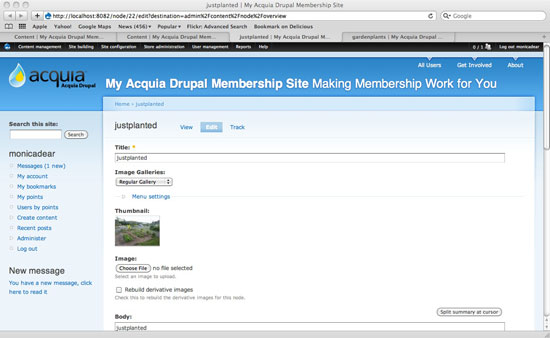
Review which of the most recent items have been moved over, and make sure that any new images are assigned to the correct gallery. For example, I am assigning this particular image to the “Regular Gallery,” which is in the dropdown list right under the title of the image.
Step 3: Fill Out the Informational Pages
Now is your chance to start creating pages about your portfolio website. Typically, you’ll start with pages such as:
- Home
- Biography
- Contact
- Privacy policy
- Terms and conditions
You can create new pages using the “Page Management” tool:
Admin > Content management > Create content > Page
Direct URL:
You can also specify whether or not the page should appear in the “Primary Links” menu, which is usually found across the top of every page. 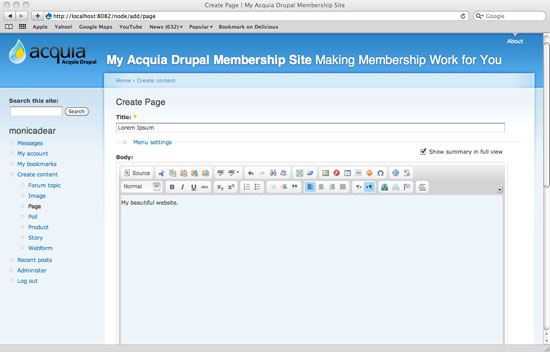
Step 4: Using Lightbox
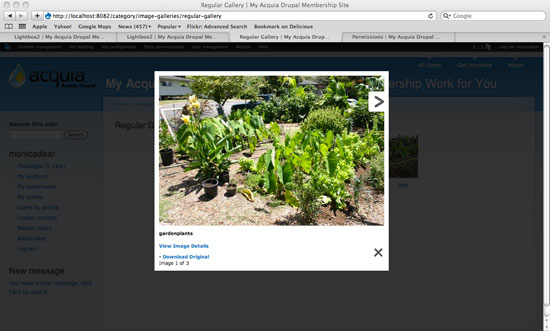
Lightbox 2 is a very nice way to present photos on a website. It allows you to upload images to the Image Gallery; and then, when a user clicks through the images, the images come up as a modal window with an arrow on either side of the image.
It’s worth briefly reviewing the available options for Lightbox. For the gallery we’re working on, we won’t change the default settings much. To configure Lightbox, go to:
Admin > Site configuration > Light box > General
Direct URL:
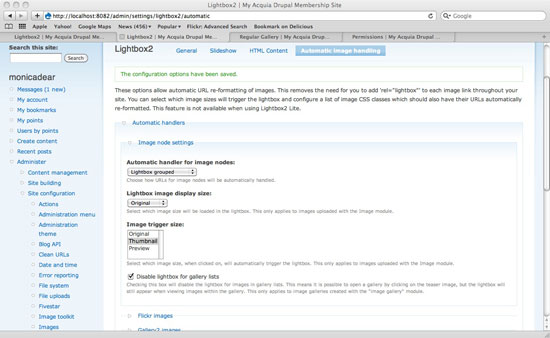
My only change to the default settings is the following:
Admin > Site configuration > Lightbox > Automatic image handling
Direct URL:
Set the Automatic handler for image nodes option to be Lightbox grouped. This means that the images will be grouped together but appear one at a time, with “Next” and “Previous” arrows and a dark shadow behind them.
Putting It All Together
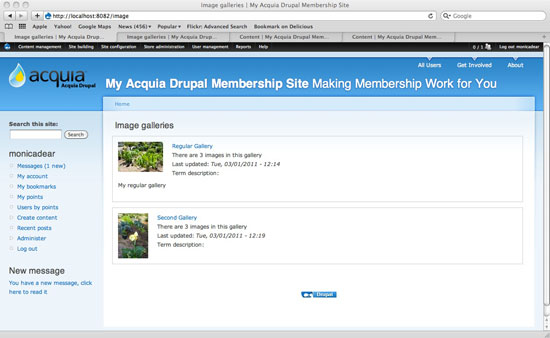
If you’re using the Image Gallery’s default functionality, then all of your galleries will appear at:
 Finally, the uploaded images themselves will appear in Lightbox format if you click on one of the thumbnails in a gallery.
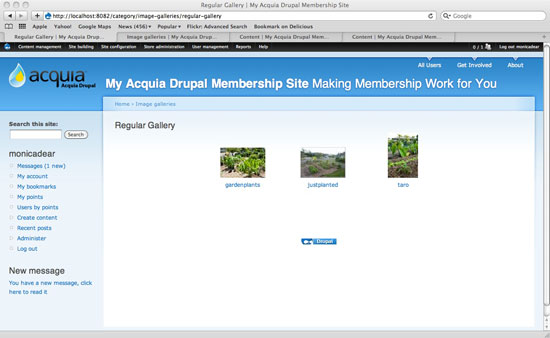
Bonus: Using Ubercart to Handle Payments
I use Ubercart to handle user payments. This software is free and open source, and it allows you to sell products on your website.
The products could be digital, such as high-resolution JPEGs (like screensavers) or PDF reports that are unlocked upon payment. Or they could be physical, such as signed prints, t-shirts, mugs, calendars or signed photos, which require shipment to the buyer. Perhaps the site owner wants to sell subscriptions to the website, in which case the product would be a “membership package” that directs the purchaser to a “paid members” section for a fixed amount of time.
You can create a product by going to:
Admin > Content management > Create content > Product
Direct URL:
If you use Ubercart, you’ll need a payment gateway such as PayPal or Authorize.net to accept payments. If you choose to accept payments directly on your website, you’ll also need to purchase an SSL certificate to make data transmission from user to your web server (and back) more secure.
Examples
Would you like to see some examples of this deployment in action? Check out the following examples:
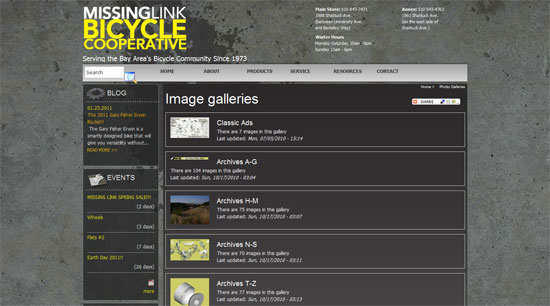
Missing Link
Images of logos, products and events for a bicycle co-op.
Wagner Society of Northern California
Images of members of an organization devoted to the famous composer. 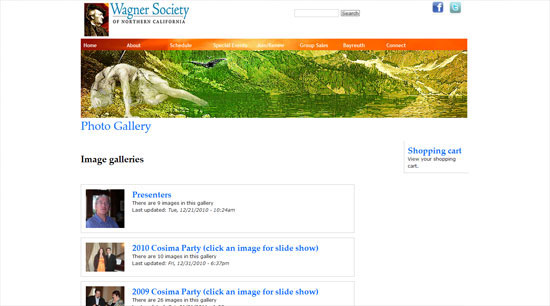
Related Content
-
 President of WebFX. Bill has over 25 years of experience in the Internet marketing industry specializing in SEO, UX, information architecture, marketing automation and more. William’s background in scientific computing and education from Shippensburg and MIT provided the foundation for MarketingCloudFX and other key research and development projects at WebFX.
 -

WebFX is a full-service marketing agency with 1,100+ client reviews and a 4.9-star rating on Clutch! Find out how our expert team and revenue-accelerating tech can drive results for you! Learn more
Make estimating web design costs easy
Website design costs can be tricky to nail down. Get an instant estimate for a custom web design with our free website design cost calculator!
Try Our Free Web Design Cost Calculator
Share this article


Web Design Calculator
Use our free tool to get a free, instant quote in under 60 seconds.
View Web Design CalculatorMake estimating web design costs easy
Website design costs can be tricky to nail down. Get an instant estimate for a custom web design with our free website design cost calculator!
Try Our Free Web Design Cost Calculator


