
Whatever profession you’re in, there’ll come a time when you’ll need your own business card. This graphic design tutorial will show you a way to create a standard two-sided business card design in Adobe Photoshop that you can take to your printer.
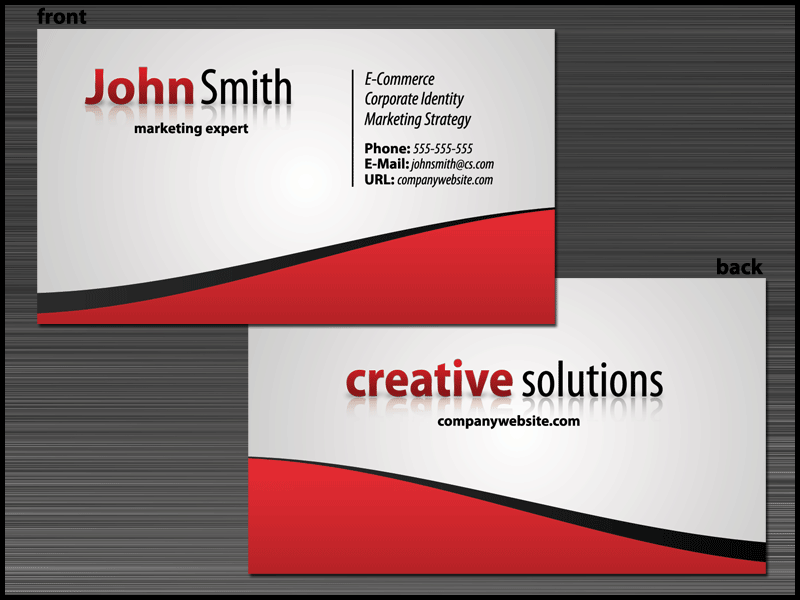
Final Result
Set up the Photoshop canvas
1 Open a new Photoshop document that is 3.75 x 2.25 inches. Make the resolution 300 pixels per inch and set the color mode to 8-bit CMYK.
A typical business card is 3.5 x 2 inches; however, to optimize the card for printing, there needs to be a quarter of an inch space along each edge called a bleed. Whatever is located in this area will not be shown in the final print.
Apply a radial gradient overlay
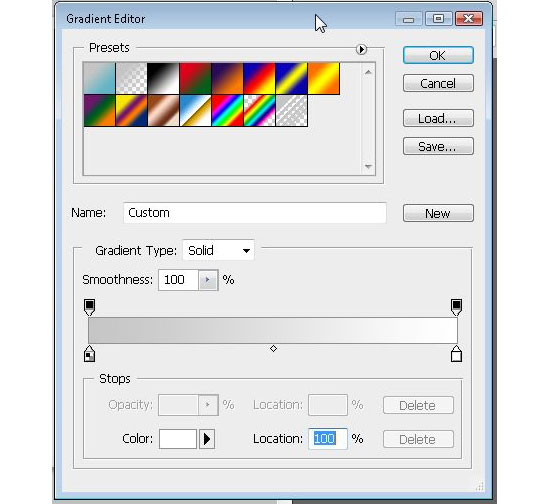
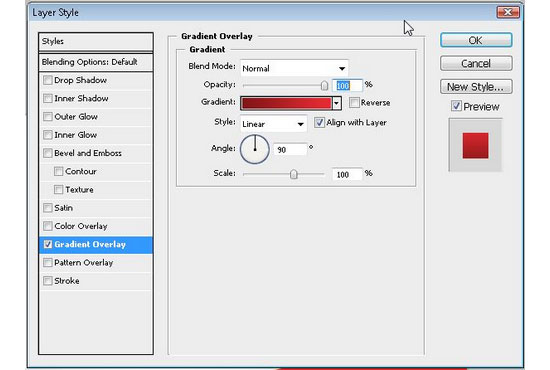
2 Fill the canvas with a radial gradient overlay. To add a gradient overlay layer style, double-click on the Background layer, make it editable and then double-click on it again to open the Layer Styles dialog box.
Check the box beside Gradient Overlay, and in the Styles option dropdown, select Radial. Use white for the lighter, innermost color, and #c6c5c5 for the darker, gray color.

Creating the red warped rectangle shape
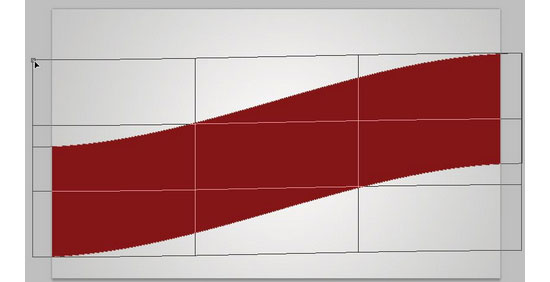
3 With the Rectangle Tool (U) from the Toolbox, draw a long, thick rectangle on the canvas like shown in the following figure. The color doesn’t matter since we will be applying a layer style to it.
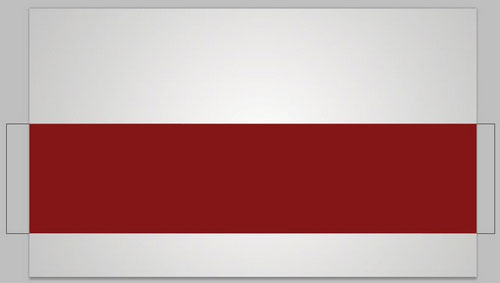
4 With the rectangle shape layer selected in the Layers Panel, push Ctrl + T to enter Free Transform Path mode (alternatively, go to Edit > Free Transform Path) and right-click inside the transform box that appears.
Choose Warp from the contextual menu, and from the Warp Options bar, choose Rise as Wrap type dropdown menu. Warp the rectangle shape using the transform controls until you have something similar to this.
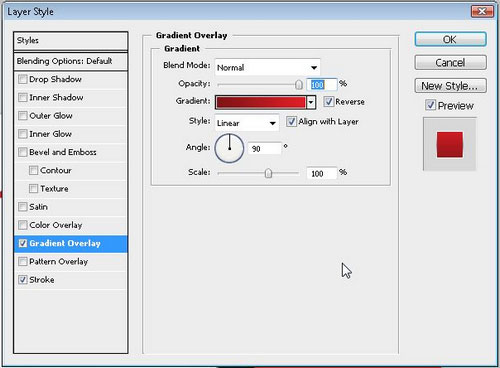
5 Apply a linear gradient layer style to the warped shape. Use #841618 for the darker color in the gradient and #e82d33 for the lighter color.
Once that’s done, use the Move Tool (V) to move the shape near the bottom of the canvas.

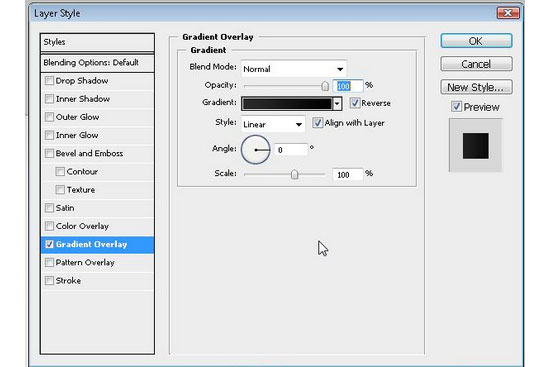
6 Duplicate the rectangle shape by pushing Ctrl + J on your keyboard. Then drag the duplicated layer below the original layer to move it behind. On this new duplicated shape layer, apply a linear gradient overlay layer style to the new shape.
Use black (#000000) for the darkest color and #2b2b2b for the lighter color. Use the Move Tool (V) on this duplicated warp layer to move it so that only some parts of the top is showing.

Creating the person’s name
7 Use the Horizontal Type Tool (T) and type “John” and “Smith” (or your own first and last name) in black on two different layers near the upper left corner of the canvas. Use 25 pt, bold, Myriad Pro for “John” and 25 pt, Myriad Pro Condensed for “Smith”.
This font family comes with newer versions of the Windows operating system, but if you do not have this font, use something clean and professional (a sans serif font family will do the trick).

8 Apply a gradient overlay and stroke layer style to “John” text layer. On the gradient overlay, use #df1f26 for the lighter red color and #811517 for the darker color.
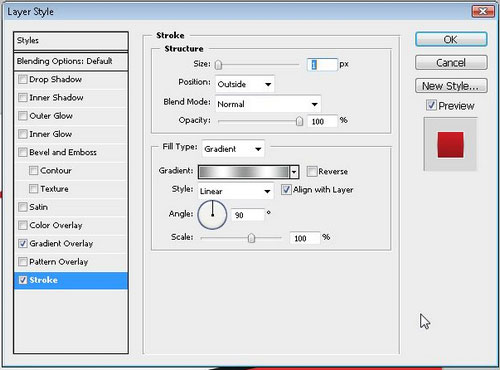
9 Also apply a Stroke layer style on both the “John” and “Smith” text layers. The stroke size is 1px and its position should be Outside.
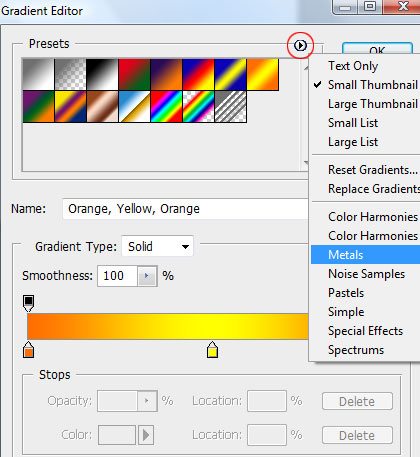
For the Fill Type stroke setting, choose Gradient from the dropdown menu. The gradient used for the stroke can be found in the Metals gradient preset, to access it, click on the rightward pointing arrow in the Presets box inside the Gradient Editor dialog box, this will show a contextual menu where you should be able to find Metals. Replace the dark gray color stops with the color #838484.
For the “Smith” layer, just apply the same stroke settings, but don’t apply the gradient overlay.

Creating a text dropshadow
10 Select both name text layers in your Layers Panel (hold down Shift and click on each on of them) and duplicate the selected layers by right-clicking, and choosing Duplicate Layers from the contextual menu that appears.
11 Right-click on these new duplicated layers and choose Rasterize Type from the contextual menu that appears. Right-click once again and choose Merge Layers to combine them into just one layer. Push Ctrl + T to enter Free Transform mode and shrink this layer vertically using the transform controls until you have something similar to shown.
This will become the text shadow.

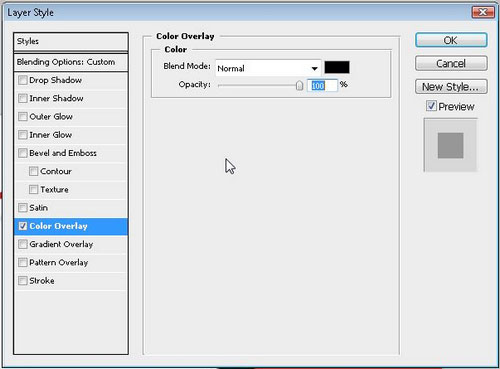
12 Double-click on the text shadow layer to enter the Layer Styles dialog box. Apply a black (#000000) color overlay to the text shadow layer and move it behind the original name layers.
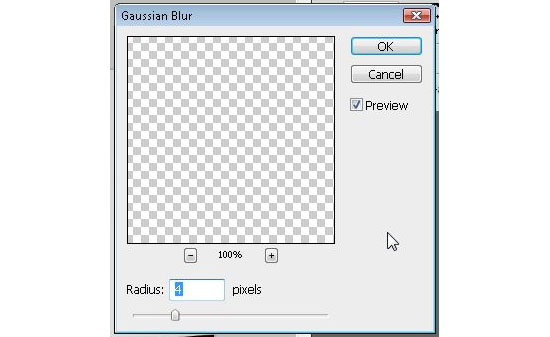
13 Apply Gaussian Blur by going to Filter > Blur > Gaussian Blur. Set the blur Radius to 4px.
Then, set the layer’s opacity in the Layers Panel to 30%.
You should have something similar to this:

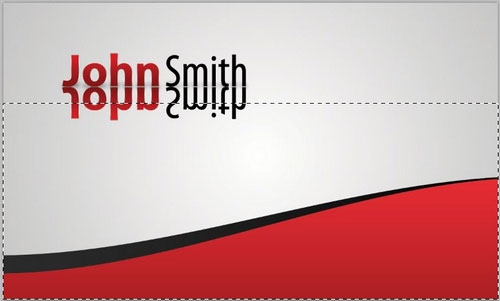
Creating the text reflection
14 Duplicate the original name layers again. Rasterize and merge the duplicated layers like before (see Step 11). Push Ctrl + T to enter Free Transform mode, right-click inside the transform box that appears, and choose Flip Vertical from the contextual menu.
Move this layer just a few pixels underneath the original text on the canvas using the Move Tool (V) and your arrow keys. Select this layer in the Layers Panel, and then drag it behind the original name layers and shadow layer. This will become the text reflection.

15 Get the Gradient Tool (G) from the Tools Panel.
In the Gradient Tool Options bar, choose the gradient preset called Foreground to Transparent and select Linear as the Style setting. Set your foreground color to black (you can do this by simply pressing D on your keyboard to reset the foreground and background color to the default). Make sure the reflection layer is the active layer in the Layers Panel, and then press Q on your keyboard to enter Quick Mask mode.
Drag the gradient from the top of the reflection layer to the bottom, then press Q once again to exit Quick mask mode. A selection will appear. Press the Delete key five times on your keyboard, then Ctrl + D to end the selection.


16 Change the reflection layer’s opacity to 20% to finish off the text reflection.

Entering the rest of the business card information
17 In black (#000000), bold Myriad Pro, type “marketing expert” (or your own job title) under the name on your canvas using the Horizontal Type Tool (T).

18 Off to the right of the name, type some of the things you specialize in (see example in the figure below) using black, 9pt, bold, Myriad Pro Condensed Italic.
Each line should be a distinct text layer.

19 Type the contact information below the previous layers. Use Myriad Pro bold for the beginning word and Myriad Pro Condensed Italic for the following words.

20 With the Line Tool from the Toolbox, draw a small 2px vertical line on your canvas to the left of the information that was just typed.

The back of the card
21 To make the back of the card, first turn the visibility off in all the text layers, leaving only the business card background. Select the entire canvas by pressing Ctrl + A (or Select > All).
Choose Edit > Copy Merged (Shift + Ctrl + C).
22 Now, Create a new document (Ctrl + N) with the same settings as the front of the card. Paste the copied selection into the new document. Go to Edit > Transform > Flip Horizontal to flip it so that it’s oriented a different way as the back of the business card.

23 Add your company name and website using the text effect techniques we’ve discussed above.
You can use Steps 7 – 16 for the company name.

Share your own work on Flickr
If you followed along the tutorial, we’d like to see what you ended up with. Please include it in the Six Revisions community group pool on Flickr.
Your thoughts? Need help?
What did you think about this tutorial?
How was the difficultly level? Did you get stuck on any part? Please let us know in the comments.
Download Source Files
- slick-business-card-typography (0.86MB, ZIP)
Related Content
-
 President of WebFX. Bill has over 25 years of experience in the Internet marketing industry specializing in SEO, UX, information architecture, marketing automation and more. William’s background in scientific computing and education from Shippensburg and MIT provided the foundation for MarketingCloudFX and other key research and development projects at WebFX.
 -

WebFX is a full-service marketing agency with 1,100+ client reviews and a 4.9-star rating on Clutch! Find out how our expert team and revenue-accelerating tech can drive results for you! Learn more
Make estimating web design costs easy
Website design costs can be tricky to nail down. Get an instant estimate for a custom web design with our free website design cost calculator!
Try Our Free Web Design Cost Calculator
Share this article


Web Design Calculator
Use our free tool to get a free, instant quote in under 60 seconds.
View Web Design CalculatorMake estimating web design costs easy
Website design costs can be tricky to nail down. Get an instant estimate for a custom web design with our free website design cost calculator!
Try Our Free Web Design Cost Calculator


