
In this tutorial, we will show you how to create a social media share menu using CSS and jQuery. We are going to create the menu using basics CSS such as the CSS background-position property and a little jQuery to make the links animated.
Final Result
Click on the image below to view the live demo.
Create the HTML
1 Let’s create the HTML first. Here is our markup.
<div id="social_nav_horizontal"> <h3> Bookmark or Share This Post </h3> <ul> <li><a class="delicious" href="http://del.icio.us/post?url=Your website title" title="Bookmark on del.icio.us">Delicious</a> <li><a class="facebook" href="http://www.facebook.com/sharer.php?u=http://yourwebsite.com" title="Share this on Facebook" >Facebook</a></li> <li><a class="stumbleupon" href="http://www.stumbleupon.com/submit? url=http://www.yoursite.com/" title="Stumble This Page" > Stumble</a></li> <li><a class="twitter" href="http://twitter.com/home?status=Your Website Title- http://yourwebsite.com@TwitterUserName" title="Tweet This Page" >Twitter</a></li> </ul> </div>
Style the HTML with CSS
This is how our menu looks without any CSS.

Notice that there is a CSS class added to each link in our HTML. For example: delicious, facebook, and so on. We use different classes so that we can give the links their own icons on the left (more on this later).
2 We will make the list items display side by side by using the float property.
Also, we have added some padding to the link elements (#social_nav_horizontal ul li a), including 28px padding on the left so that when we add the background, there is enough space for the social media icons.
#social_nav_horizontal { margin-left: 100px; font-family: Futura, Verdana, Sans-Serif; font-size: 18px; color: #8e9090; } #social_nav_horizontal h3 { display:inline; padding: 0px 10px; border-bottom:dashed 1px #ccc; } #social_nav_horizontal ul { margin: 0; padding: 0; margin-top:20px; } #social_nav_horizontal ul li { float: left; padding: 5px 0 0 5px; margin-left: 5px; list-style-type: none; } #social_nav_horizontal ul li a { padding: 4px 0 0 28px; height: 32px; color: #999; text-decoration: none; line-height: 1.45em; }Here’s how our menu looks with the above CSS style declarations.

3 After that, we add the CSS background to each class. You can use your own social media icon sets or check out the Freebies section here on Six Revisions to find free social media icons. Note that you will have to adjust the background-position and the left padding of #social_nav_horizontal ul li a depending on the sizes of the social media icons you use.
Here is the CSS for the first social media link (Delicious).
.delicious { background:url(images/delicious.png) no-repeat; background-position:0px-1px; }Here is the visual representation of this code:

This is how the Delicious icon should display:

4 We add a CSS declaration for each of the social media links.
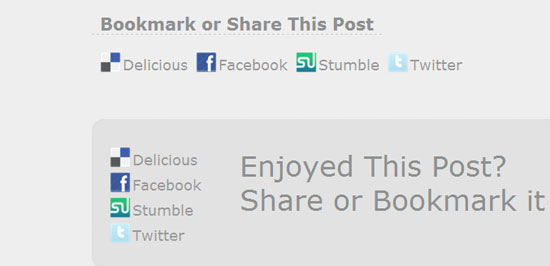
.delicious { background:url(images/delicious.png) no-repeat; background-position:0px -1px; } .facebook { background:url(images/facebook.png) no-repeat; background-position:0px -1px; } .stumbleupon { background:url(images/stumbleupon.png) no-repeat; background-position:0px -1px; } .twitter { background:url(images/twitter.png) no-repeat; background-position:0px -1px; }If everything is right, here is how it should look.

Another version: Vertical menu
So, if you want to create a CSS only menu, you’re done.
But now, we are going to add a little jQuery and change the menu’s orientation to spice it up a little.
This one will be vertical menu.
5 I just took off the CSS float property from the list item declaration (#social_nav_horizontal ul li) to covert it to a vertical menu.

Add animation effects with jQuery
Time to add some jQuery. First, do not forget to add the jQuery library to your HTML page (here’s a guide for that, if you’re not familiar with jQuery).
We will be adding an effect that nudges the link to the right when the user hovers over it.
6 In the first line of our jQuery script, we select the elements we want to apply the effect to: #social_nav_horizontal ul li a.
We apply an event listener method, .hover, which will listen to the event that the user hovers over (and out of) a link item. We feed the .hover method the functions we want to execute when the user hovers over a link item (first function), and also when they hover out of the link (second function).
We use the .animate method on the hovered-over element to move them to the right by modifying its margin-left CSS property.
We also use the .stop method before the .animate method to prevent the animation from queuing it up.
Basically, the .stop method will stop any other ongoing animation events on $(this) element.
$(document).ready(function() { $('#social_nav_vertical li a').hover( // on mouse over move to left function() { $(this).stop().animate({ marginLeft: '20px' },300); }, // on mouse out, move back to original position function() { $(this).stop().animate({ marginLeft: '0px' }, 300); }); });
Here is how it looks when someone mouses over a link.
You can check out the demo to see it working.

Wrap up
That’s it! Please feel free to add any suggestions to improve this in the comments.
Download Source Files
- social-share-css-jquery (ZIP, 0.017 MB)
Related Content
-
 President of WebFX. Bill has over 25 years of experience in the Internet marketing industry specializing in SEO, UX, information architecture, marketing automation and more. William’s background in scientific computing and education from Shippensburg and MIT provided the foundation for MarketingCloudFX and other key research and development projects at WebFX.
 -

WebFX is a full-service marketing agency with 1,100+ client reviews and a 4.9-star rating on Clutch! Find out how our expert team and revenue-accelerating tech can drive results for you! Learn more
Make estimating web design costs easy
Website design costs can be tricky to nail down. Get an instant estimate for a custom web design with our free website design cost calculator!
Try Our Free Web Design Cost Calculator
Share this article


Web Design Calculator
Use our free tool to get a free, instant quote in under 60 seconds.
View Web Design CalculatorMake estimating web design costs easy
Website design costs can be tricky to nail down. Get an instant estimate for a custom web design with our free website design cost calculator!
Try Our Free Web Design Cost Calculator


