

Introduction
This article will guide you through the process of installing Ruby on Rails, and any other software that is required to begin using it. This is the first of two articles, Part 1 will show you how to install Ruby on Rails (on Windows) and Part 2 will show you how to create a basic blog. In order to create a web application with Rails, you will need the following software:
- Ruby (The interpreter for the Ruby Language)
- DBMS (This will be MySQL for this tutorial)
- Rails (Obviously)
First, Installing Ruby!
Ruby is an interpreted language, which means that you don’t have to compile your code before you can execute it – it is interpreted at runtime. For this, we require the Ruby interpreter. So let’s get started!
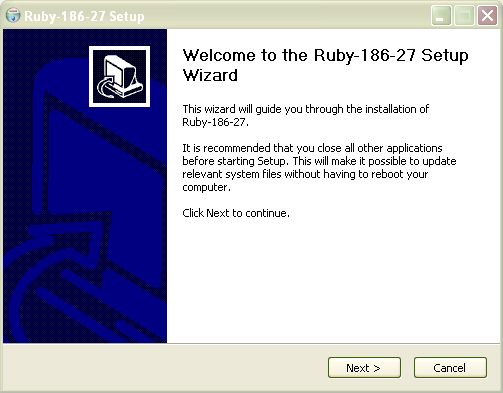
To install the Ruby interpreter, you will need to download one-click installer. After initiating the setup process, by double clicking on the one-click installer, you will be guided through the installation by the setup wizard, as follows: This screen tells you what you are installing (Ruby!) and what version. Nothing much to see here, Click “Next” to move on.
 Simply agree to the license agreement by clicking “I Agree” (or read it, if you have too much time on your hands).
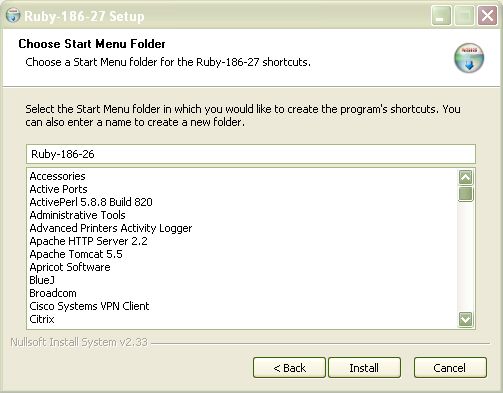
 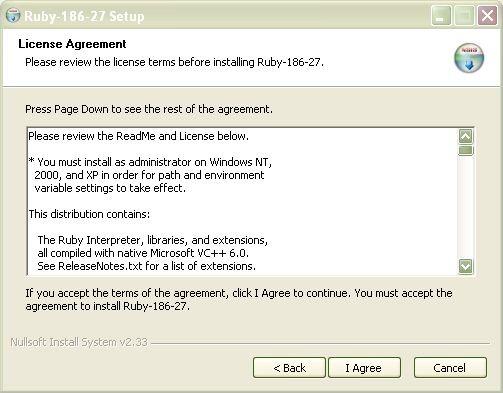 This screen will ask you what additional components you want to install. “ScITE” and “Enable RubyGems” should be ticked, as shown, then click “Next“.
 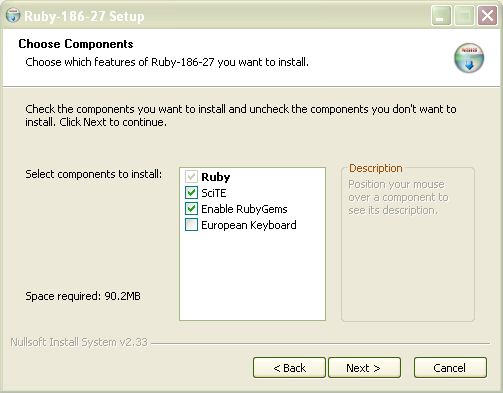 Choose a location for your installation. It is suggested that you leave this as the default.
 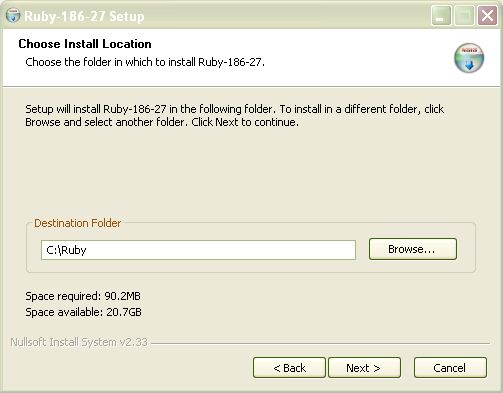 And finally, click “Install” to complete the installation.
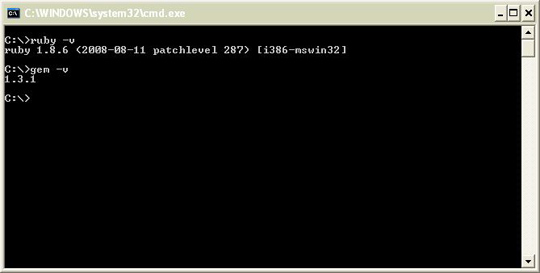
 After the installation is complete, you can check that the installation is correct by keying
 ruby -v at a command prompt. The version number the Ruby interpreter should appear, as shown below. Also, check to see if the gem command is available by keying gem -v.
Installing MySQL
First, download the setup file by going to the MySQL downloads page. About half way down the page you should see a link “No thanks, just take me to the downloads!“; click on this link, then pick the download mirror you wish to obtain the files from. Once downloaded, to install MySQL, you can follow any of the helpful tutorials out there.
This one, at Global Nerdy, will do just fine. Important: Remember to take a note of your root password when you create it!
Installing Rails
Installing Rails is simple using the RubyGems package manager (which should be installed along with the Ruby interpreter). Simply key the following at a command prompt:
> gem install rails
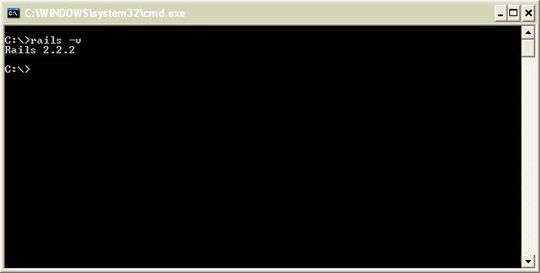 Once this command has finished executing, you can check that it has installed correctly by keying
 rails -v at a command prompt: Note: don’t worry too much about the version number.
As long as it’s 2.2.2 or above, you’re fine. That’s it! You are now ready to write Ruby on Rails web applications.
In Part 2 of this tutorial, you will learn how to create a basic blog from scratch.
Other Useful Resources for Getting Started
Here are a handful of excellent resources on Ruby on Rails that we recommend.
Other Ruby on Rails Installation Tutorials
- Installing Ruby on Rails on Linux
- A Guide to using Ruby on Rails with OS X Leopard
The Ruby Language
- Humble Little Ruby Book (Free PDF)
- Interactive Ruby Tutorial (Really great interactive tutorial)
- Poignant’s Guide to Ruby
Editors
- Komodo Edit (Windows)
- e-TextEditor (Windows)
- PSPad (Windows)
- TextMate (OS X)
- Vim (Linux)
Blogs
- Loud Thinking (David Heinemeier Hansson)
- Riding Rails (Official Rails Blog)
- Ruby Inside
- Nuby on Rails
- Ruby on Rails Podcast
- has_many :bugs, :through => :rails
- Obie Fernandez
- theRailWorld.com
Screencasts
- Railscasts (Excellent Resource!)
- Peepcode
- Rails Envy
The “Getting Started with Ruby on Rails” Series
This is a two-part article series that is aimed at getting beginner’s up and running with Rails. Stay tuned by subscribing to the RSS feed so that you can be notified when part two is published.
- Part 1: Getting Started with Ruby on Rails: Installation
- Part 2: Getting Started with Ruby on Rails: Creating a Simple Blog
Related content
About the Author

-
 President of WebFX. Bill has over 25 years of experience in the Internet marketing industry specializing in SEO, UX, information architecture, marketing automation and more. William’s background in scientific computing and education from Shippensburg and MIT provided the foundation for MarketingCloudFX and other key research and development projects at WebFX.
 -

WebFX is a full-service marketing agency with 1,100+ client reviews and a 4.9-star rating on Clutch! Find out how our expert team and revenue-accelerating tech can drive results for you! Learn more
Make estimating web design costs easy
Website design costs can be tricky to nail down. Get an instant estimate for a custom web design with our free website design cost calculator!
Try Our Free Web Design Cost Calculator
Share this article


Web Design Calculator
Use our free tool to get a free, instant quote in under 60 seconds.
View Web Design CalculatorMake estimating web design costs easy
Website design costs can be tricky to nail down. Get an instant estimate for a custom web design with our free website design cost calculator!
Try Our Free Web Design Cost Calculator


