

This tutorial shows you how to create a basic blog using Ruby on Rails. By covering the design aspects of a Rails web application, it makes it easier to understand the concepts behind Rails and how they fit together.
The first part of this article Getting Started with Ruby on Rails: Installation, shows you how to install Ruby on Rails.
Brief Overview of Ruby on Rails
Ruby on Rails is a framework for the Ruby language, which is used for rapid development of web applications. It does this by allowing you to concentrate on solving your clients’ problems and not getting caught up in building an infrastructure to support your clients problem.
Let’s face it, you don’t want to build database access layer every time you start a new project.
Neither will you want to implement a fully functioning MVC pattern on a regular basis. This is the whole point of frameworks; they give you a starting point from which you can build upon. This allows you to concentrate on the clients needs, not the so-called yak shaving tasks, which can hold you back.
A Few Words About MVC
It’s worth mentioning MVC (Model-View-Controller) because it can be one of the factors that discourages people from trying frameworks like Rails.
MVC is a relatively advanced programming topic, however, I’m not going to suggest you learn how to implement the MVC pattern, just learn how to make use of it. With this in mind let look what each of the letters in the acronym M.V.C. means and how they fit into web development.
Model
The model layer is where you define classes for the data your application will use/store.
For instance, if you want to store posts for a blog, you will have a “Post” model. The model has the capability to interact with the database, to retrieve and store data. This functionality is gained by inheriting it from the ActiveRecord super class.
Any methods, which act upon this data, should also be placed in the model.
View
The view layer has one main purpose – to return the relevant HTML to be rendered on the users browser. In Rail a view is held in an erb (Embedded Ruby) file, which contains both HTML and embedded Ruby statements.
Controller
Without the controller, nothing would happen. The controller interacts with the model to retrieve and store data.
It will then pass any data, acquired from the model, to the view. The view returns the resulting HTML to the controller and the controller sends this back to the users browser.
MVC Summary
This is quite a concise overview of MVC. I highly recommend that you read up on this topic, as it is the key to cracking Rails.
This article from betterexplained.com is a great resource for learning MVC in Rails. However, the best way to learn is, install the framework and start playing with it.
Creating a new Rails Project for your Blog
Before you can do anything, you need to create a new project. In Rails, a project is a folder structure that is used to store all the files, which are relevant to you web application.
To create a project, key the following command at the command prompt:
> rails myblog -d mysql
Note in this case we are using MySQL as the DBMS. This command will create a folder called myblog that holds all the relevant project folders.
Important Files and Folders
| File/Folder | Purpose |
|---|---|
| config\database.yml | This file is a YAML (stands for – YAML Ain’t a Markup Language) file. It contains details about your DBMS provider and the authentication details for your DBMS. |
| config\routes.rb | This is a ruby file.
It allows you to configure how HTTP requests will be routed. |
| app\controllers\ | Contains controller files. Controllers are ruby files. |
| app\helpers\ | Contains helper files. Helper files are ruby files which are used to define logic which doesn’t belong in the model but is too long-winded to be embeded in the view. |
| app\models\ | Contains model files.
Model files are ruby files. They inherit most of there functionality from ActiveRecord but you can also build upon this functionality by writing your own methods. |
| app\views\ | Contains a sub folder for each controller file that exists. For instance, if there is a controller called “posts_contoller.rb” there will be a view sub-folder called “posts”. |
| public\images\ | Contains any image files that belong to your website. |
| public\javascripts\ | Contains any javascript files that are used by your website. |
| public\stylesheets\ | Contains any CSS files that belong to your website. |
| db\migrate | Contains “migration” files, used to migrate a database from one state to another (more on this later) |
Application Design
In order to create a Rails application you have to think about how the constituent data structures will relate to each other.
There are different levels of design that you can carry out, however, for the sake of keeping things simple, we shall… keep things simple.
So you’re designing a blog application; where should you start? First, grab a pen and some paper and write a small paragraph about what your applcation is and what it should do.
After you’re finished, highlight/underline the nouns that are required to store information to the database. For our simple blog application, a sentence will be suffice:
“My application is a web log (blog). It will allow me to write posts and will allow people to comment on them.”
So we need models for posts, people (or users) and comments.
Again, in an effort to keep things simple, we can forget about people/users. So we need to have a model for both, posts and comments.
Next, you will need to think about how the models should relate to each other. The most common relationships in Rails are defined as follows:
- One-to-One
- One-to-Many
- Many-to-Many
You have to ask yourself what the relationship is between the given models. With posts and comments – a given post has many comments and a comment belongs to one post. This logic suggests a One-to-Many relationship.
We will visit relationships later.
Scaffolding
Scaffolding can be used for building rapid prototypes/mock-ups for your client. They can also be very useful for learning how to use Rails. In one simple command you can create a model, controller and several views, effectively building a large chunk of functionality in one fell swoop.
Creating Posts using Scaffolding
To create the relevant scaffold files for posts, you can generate them with a single command:
> ruby script/generate scaffold post title:string body:text
This command creates lots of files.
It creates a controller for posts called posts_controller.rb and a model called post.rb (note, not plural). It also creates a sub-folder in the views folder called posts. This contains four files, index.html.erb, edit.html.erb, show.html.erb, new.html.erb.
You also may have noticed that we have specified the fields that are required i.e. title and body in addition to their their types “string” and “text”, respectively.
Creating Comments using Scaffolding
Similarly, to create the relevant scaffold for comments, run this command:
> ruby script/generate scaffold comment name:string body:text post:references
At the end of this command, you might have noticed the text “post:references”. This will be used to create the foreign key field for linking to the primary key of the posts table.
Relating the Post and Comment Models
Now that you have two models you need to create a relational link between them. To do this, you need to add a line of code to both the post and comment models, as follows:
post.rb
class Post < ActiveRecord::Base
 has_many :comments
end
comment.rb
class Comment < ActiveRecord::Base
 belongs_to :post

end
This makes it really easy to find associated records. You will see how easy later when we need to display comments, which are related to a given post.
How do I create the Database and Tables?
Now that you have created the models, you need to create the database then create tables to hold information about posts and comments.
To create the database you need to add the username and password into database.yml file, similar to below.
development:
 adapter: mysql
 encoding: utf8
 reconnect: false
 database: myblog_development
 pool: 5
 username: root

 password: yourrootpassword
 host: localhost
After you have modified the database.yml file with your database logon details, you need to run the following rake commend from a command prompt.
Also, be sure to set your current directory to the project folder first:
 > cd myblog
 > rake db:create
The database should now be created.
Database Migration
In Rails, a Migration is the name given to the process of moving your database from one state to another. Some examples of migrating your database from one state to another are:
- Creating tables
- Removing tables
- Adding new fields
- Removing fields
When you created the two models for posts and comments using scaffold, several files were created automatically. In particular, migration files were created in the db\migrate folder. These files are used to create the tables for the post and comment models.
To build the tables using the migration files you should run the following command:
> rake db:migrate
The “posts” and “comments” tables should now be created.
Let’s See How Things Look!
Ok, lets fire up Webrick, Rails built-in web server, and see how things look.
> ruby script/server
Now browse to http://localhost:3000/posts on your favourite browser and you should see a screen that resembles the below screenshot. By default this URL request forwards control to the “index” method in the posts controller, then the “index.html.erb” view is rendered.
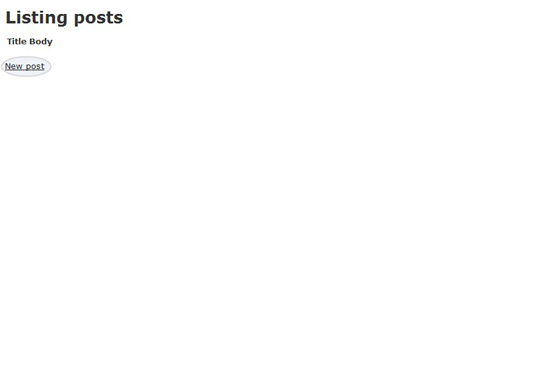
If you click the “New Post” link, highlighted, you will be directed to the URL, http://localhost:3000/posts/new, where you will be presented with a form for creating new posts. This URL request calls the “new” method in the posts controller, then the “new.html.erb” view is rendered.

Click on the “Create” button to save your post, this will direct you to the URL, http://localhost:3000/posts/show/1, displaying the post details.
This URL request calls the “show” method in the posts controller. It also passes one parameter, “1”, to the show method. Finally, it renders the “show.html.erb” view.

Setting up a Home Page
You’ll likely want to have the root URL (http://localhost:3000) direct the user towards your posts, effectively making it your home page.
To do this you will first need to delete the public/index.html file.
The second thing you need to do is set up a route in your config\routes.rb file. Open this file in notepad (or your favourite editor) and add a new line to the end using map.root, as shown below.
ActionController::Routing::Routes.draw do |map|
 map.resources :comments
 map.resources :posts
 map.connect ':controller/:action/:id'
 map.connect ':controller/:action/:id.:format'
 map.root :controller => "post"

end
Note: This route file has all the commented lines removed for the sake of clarity and conciseness. For more on routes, try the Rails API Documentation
Allow the User to Comment!
Modify the Route
Before making any changes to the view, you need to scope the “comments” route within the “posts”. Modify the route.rb file to look like the code below.
ActionController::Routing::Routes.draw do |map|
 map.resources :posts, :has_many => :comments

 map.connect ':controller/:action/:id'
 map.connect ':controller/:action/:id.:format'
 map.root :controller => "post"
end
Modify the View
Now modify the views/posts/show.html.erb file to be the same as the code below. Here, we are rendering the post, showing any related comments and then displaying a form to add new comments.
<p>
 <b>Title:</b>
 <%=h @post.title %>

</p>

<p>
 <b>Body:</b>
 <%=h @post.body %>
</p>

<h2>Comments</h2>

<% @post.comments.each do |c| %>
 <p>
 <b><%=h c.name %> said:</b><br />
 <%= time_ago_in_words(c.created_at) %> ago
 </p>

 <p>
 <%=h c.body %>
 </p>
<% end %>

<% form_for [@post, Comment.new] do |f| %>
 <p>

 <%= f.label :name, "Author" %><br />
 <%= f.text_field :name %><br />
 <%= f.label :body, "Comment Description" %><br />
 <%= f.text_area :body %>
 </p>

 <p>
 <%= f.submit "Add Comment" %>
 </p>
<% end %>
Modify the Comments Controller
Remove all the methods that were automatically created in the comments_controller.rb file, as they are not required for our web app. Add one new method called “create” as shown in the code below.
This simply creates a comment record in the “comments” table, which is related to a given post.
class CommentsController < ApplicationController
 def create
 @post = Post.find(params[:post_id])
 @comment = @post.comments.create!(params[:comment])
 redirect_to @post
 end
end
Refresh the browser (make sure your server is still running at the command prompt). You should get something similar to the below screenshot.
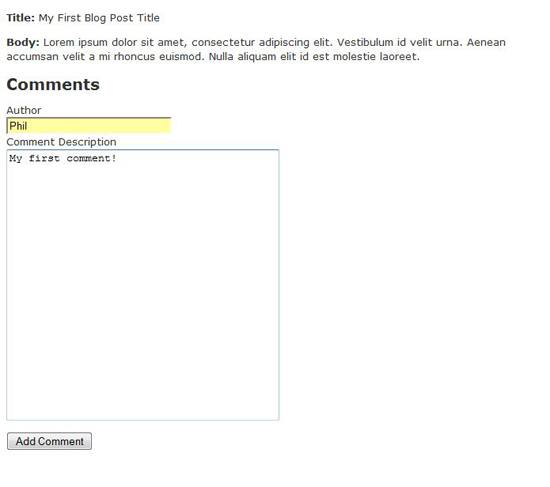
Now you can try to add a comment. Enter a comment and click “Add Comment”. The new comment should appear under the post as shown below.

Summary
What have you Learnt?
You have learnt the basic concepts behind application design and translating the design into a working Rails web application. Having, at least, a basic understanding of application design is important when learning Rails and is the key to succeeding.
How can you improve the Blog?
What we covered in this tutorial was just enough to get the message across. There are plenty of things you could do to improve things.
Adding some CSS or using some AJAX to make things run a bit smoother are just a few suggestions.
What Next?
Try learning MVC, so you really understand the concepts behind it. Try to understand the advantages of Rails and MVC; this will motivate you to learn the framework. However, while reading up on the theory is good, you really need to just get stuck in and play with the framework.
Download and Install Rails at take your first steps towards more productive and enjoyable web development.
Related content
About the Author

-
 President of WebFX. Bill has over 25 years of experience in the Internet marketing industry specializing in SEO, UX, information architecture, marketing automation and more. William’s background in scientific computing and education from Shippensburg and MIT provided the foundation for MarketingCloudFX and other key research and development projects at WebFX.
 -

WebFX is a full-service marketing agency with 1,100+ client reviews and a 4.9-star rating on Clutch! Find out how our expert team and revenue-accelerating tech can drive results for you! Learn more
Make estimating web design costs easy
Website design costs can be tricky to nail down. Get an instant estimate for a custom web design with our free website design cost calculator!
Try Our Free Web Design Cost Calculator
Share this article


Web Design Calculator
Use our free tool to get a free, instant quote in under 60 seconds.
View Web Design CalculatorMake estimating web design costs easy
Website design costs can be tricky to nail down. Get an instant estimate for a custom web design with our free website design cost calculator!
Try Our Free Web Design Cost Calculator


